Step 1: Duplicate the Live AI Booking Workflow
Go to Workflows inside your Intellia account.
Locate the workflow named:
[TEMPLATE – DUPLICATE BEFORE USING] 1CallClose™ AI Booking Workflow v1 CAA 1 Jan 26
Duplicate this workflow.
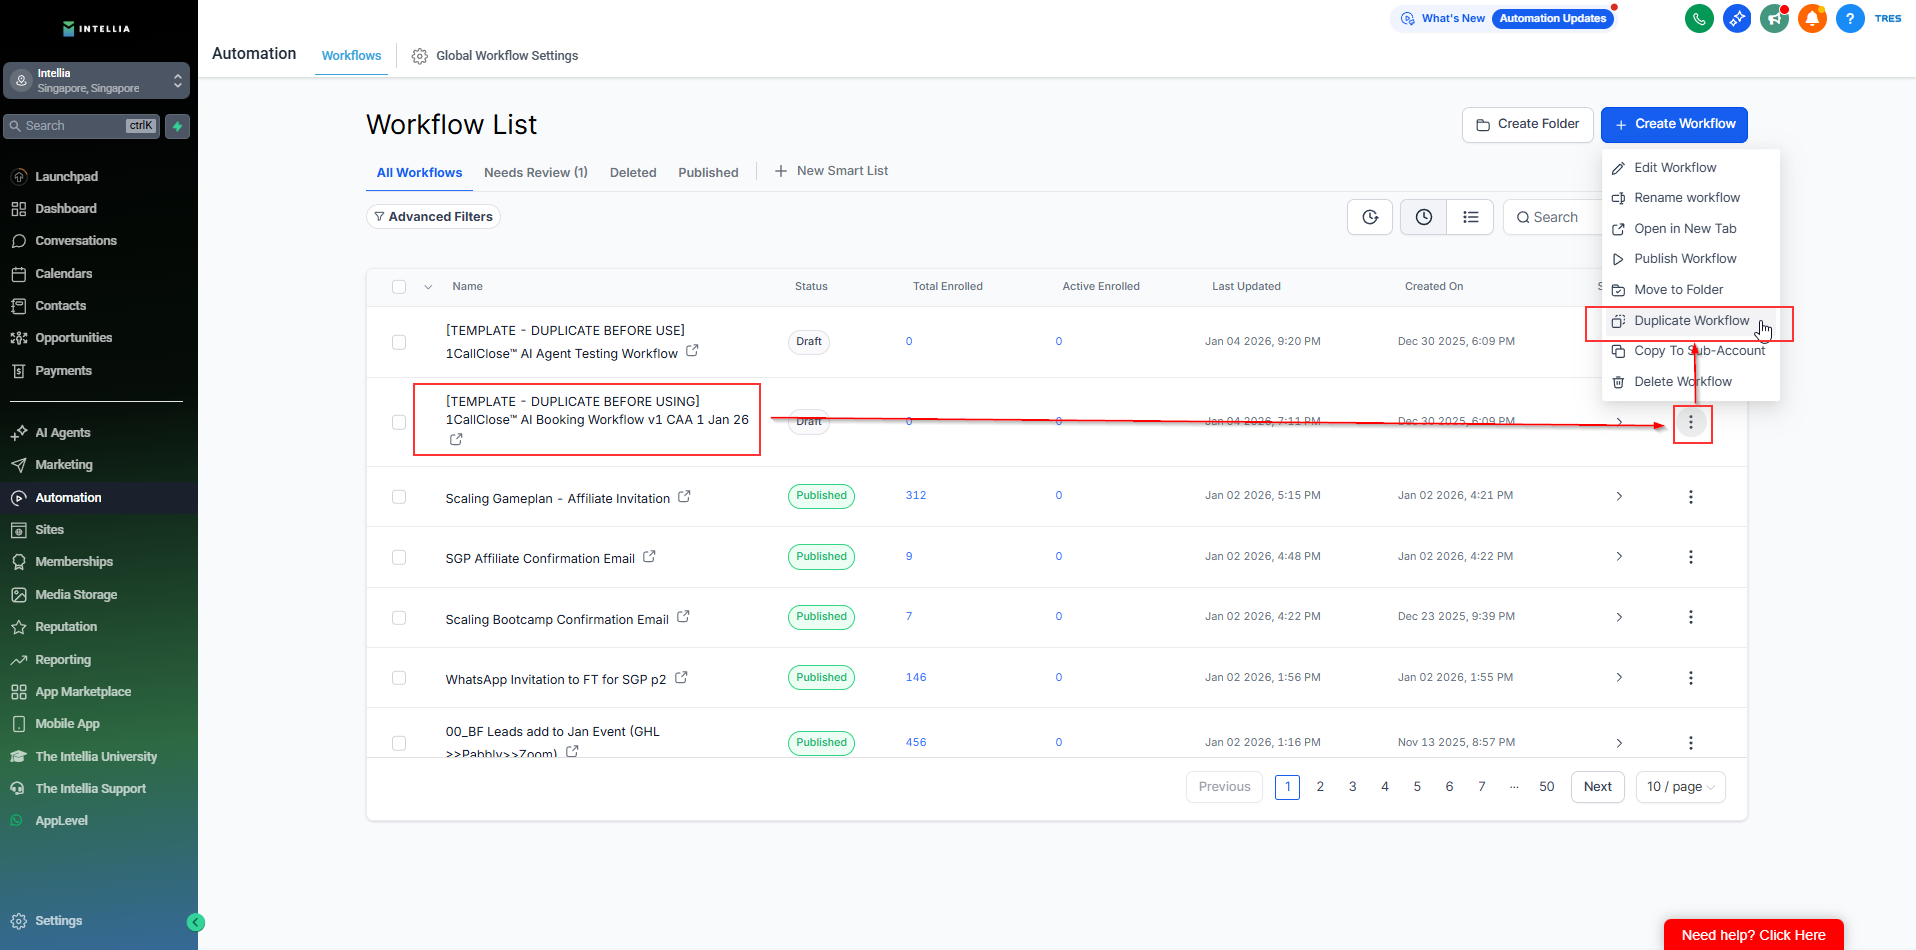
Rename the duplicated version clearly (for example: 1CC AI Booking – LIVE).
ℹ Important:
This workflow is used for actual leads.
You will copy your finalized setup from the testing workflow into this live workflow.
Step 2: Open Both Workflows Side-by-Side
To make copying easier:
Open the following two workflows in separate browser tabs:
[TEMPLATE – DUPLICATE BEFORE USE] 1CallClose™ AI Agent Testing Workflow
[TEMPLATE – DUPLICATE BEFORE USING] 1CallClose™ AI Booking Workflow v1 CAA 1 Jan 26
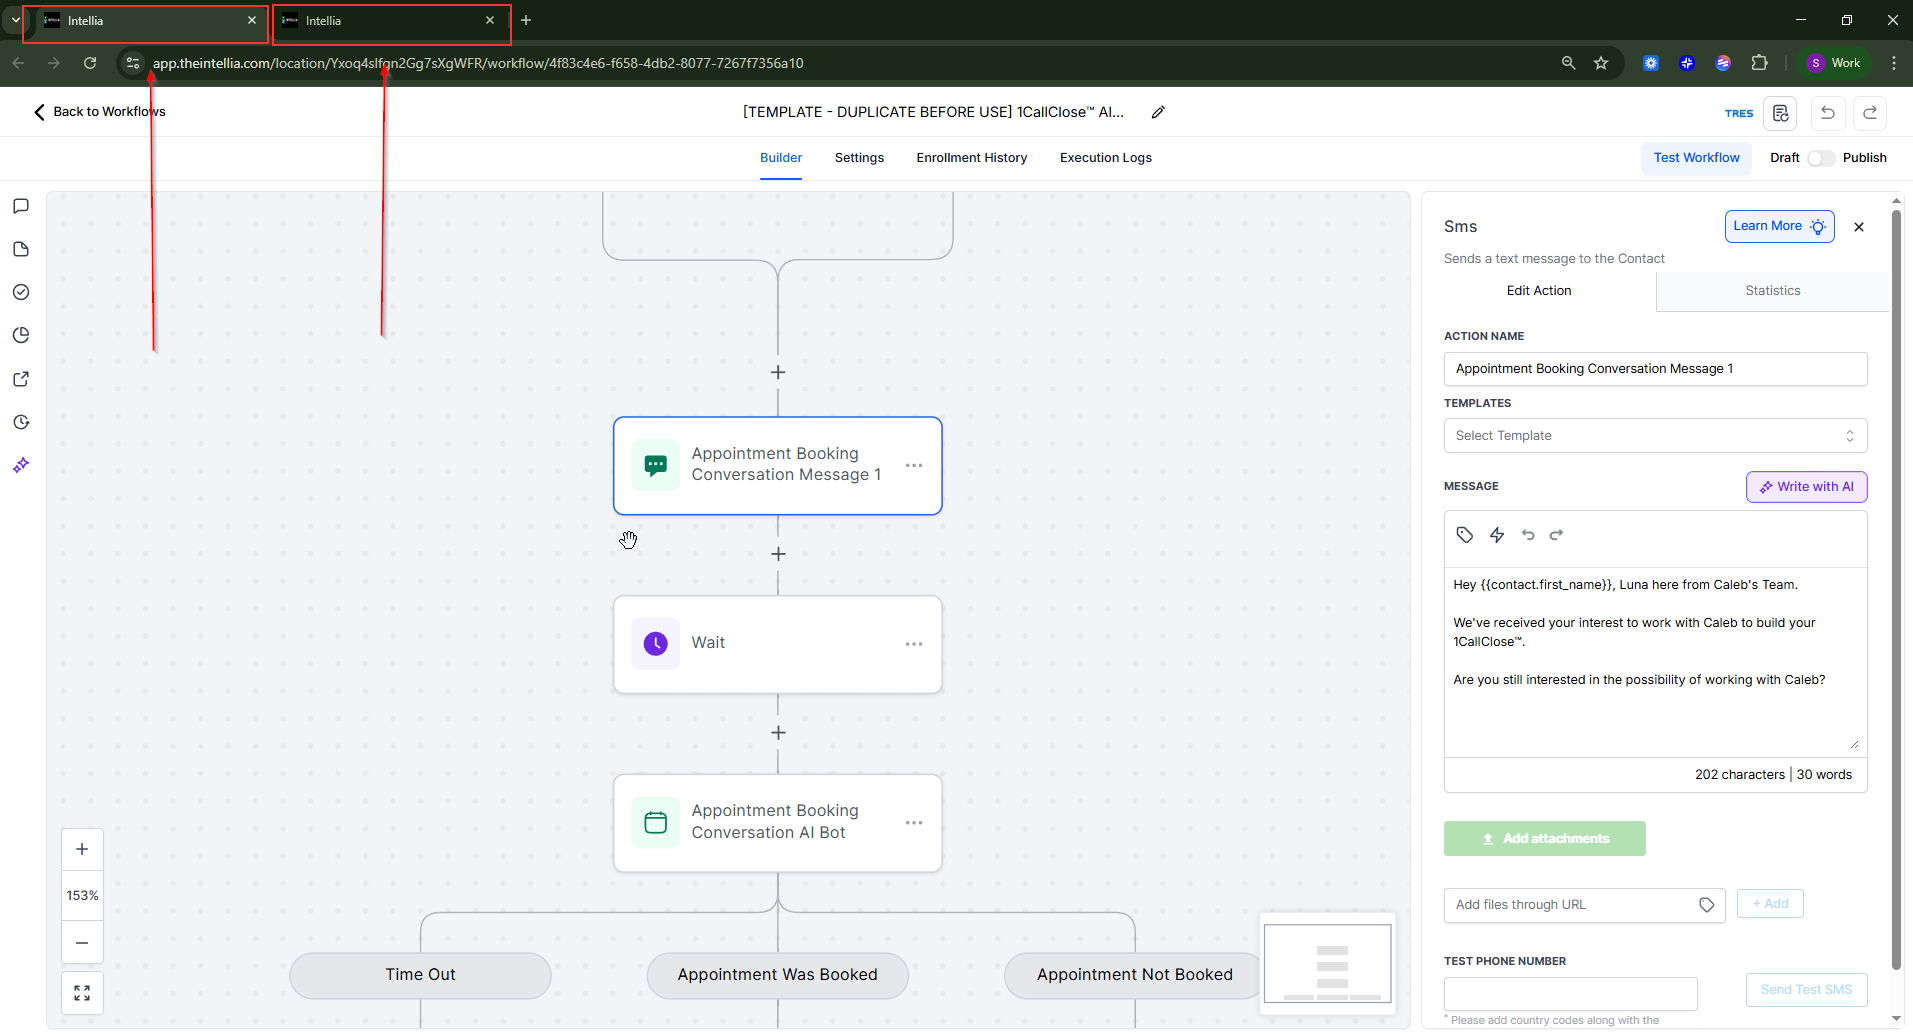
Keep both tabs open so you can copy configurations accurately from test → live.
Step 3: Connect the Live Workflow to Your Real Opt-In Form
This step connects your Live AI Booking Workflow to the real form your leads will submit from your landing page.
Open your To Live AI Booking Workflow (the duplicated to live version).
Go to the Trigger section.
Locate the Trigger: Opt-in filter.
Update the filter:
Form is → select your real opt-in form
This should be the form used on your active landing page (if applicable).
Save the changes.
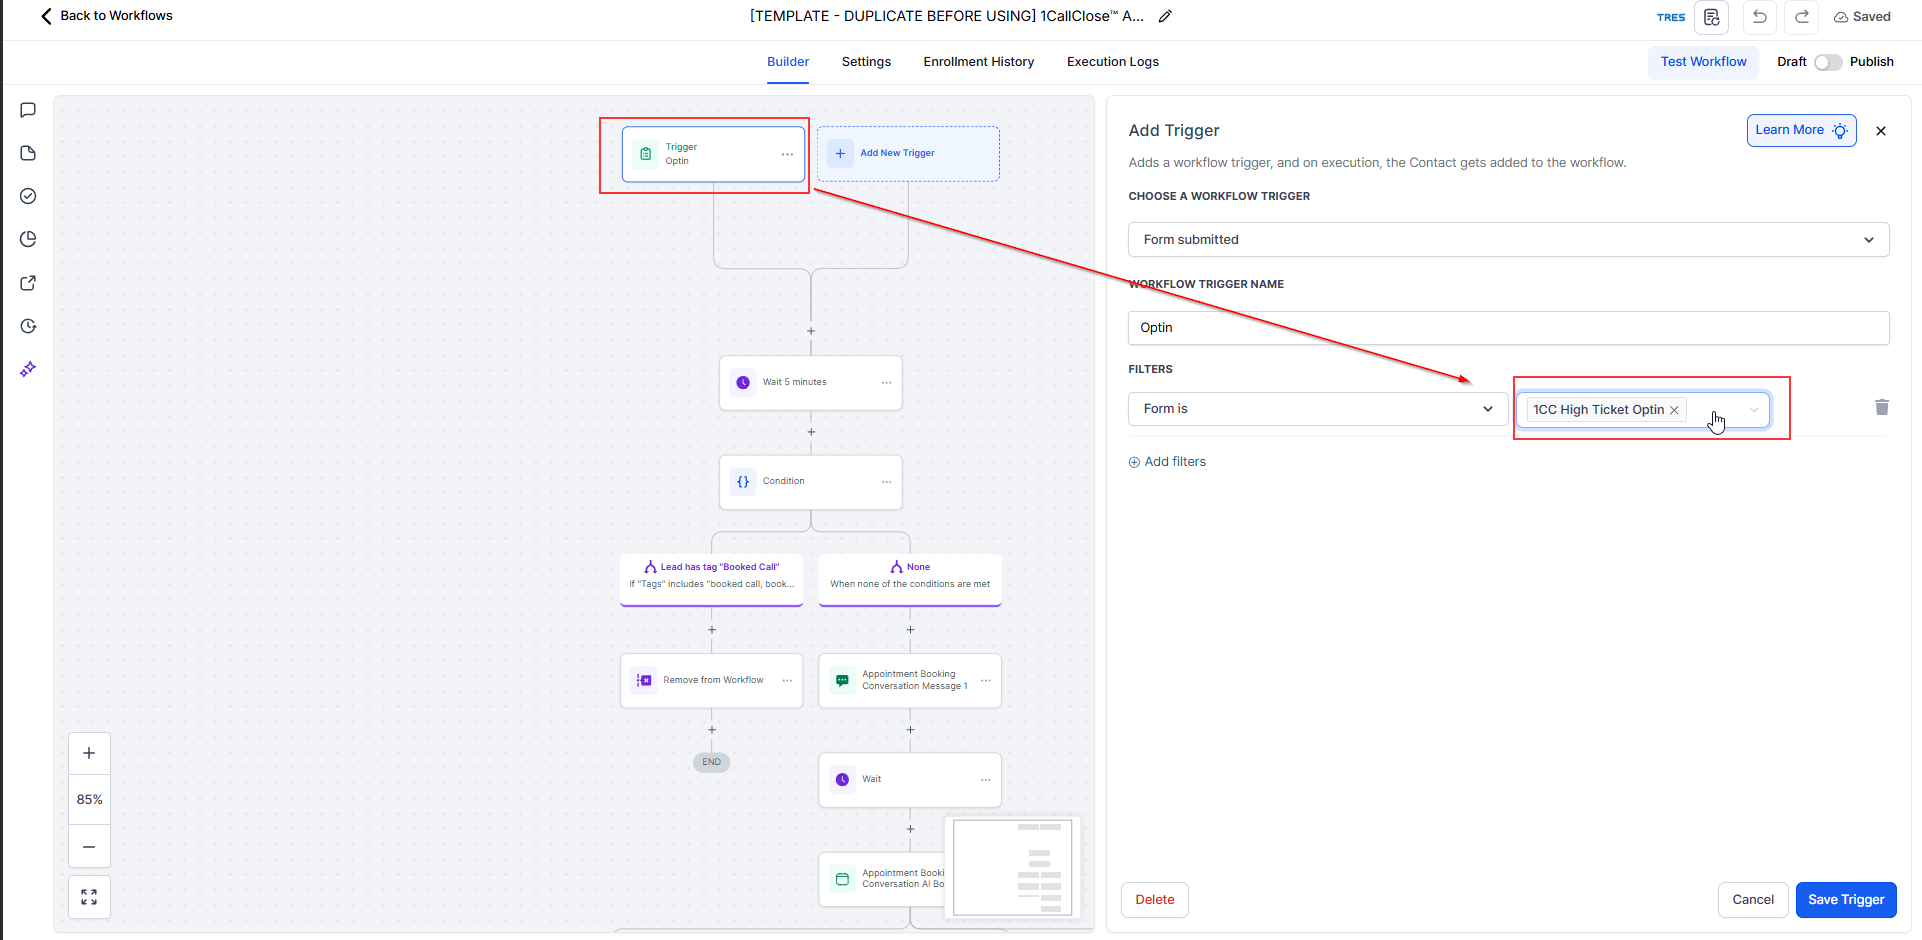
⚠ Important:
Make sure you are selecting the actual form your leads will fill out, not the test form used earlier. This ensures real leads trigger the AI booking conversation correctly.
Once this step is completed, your live workflow is now connected to your landing page and ready to receive real leads.
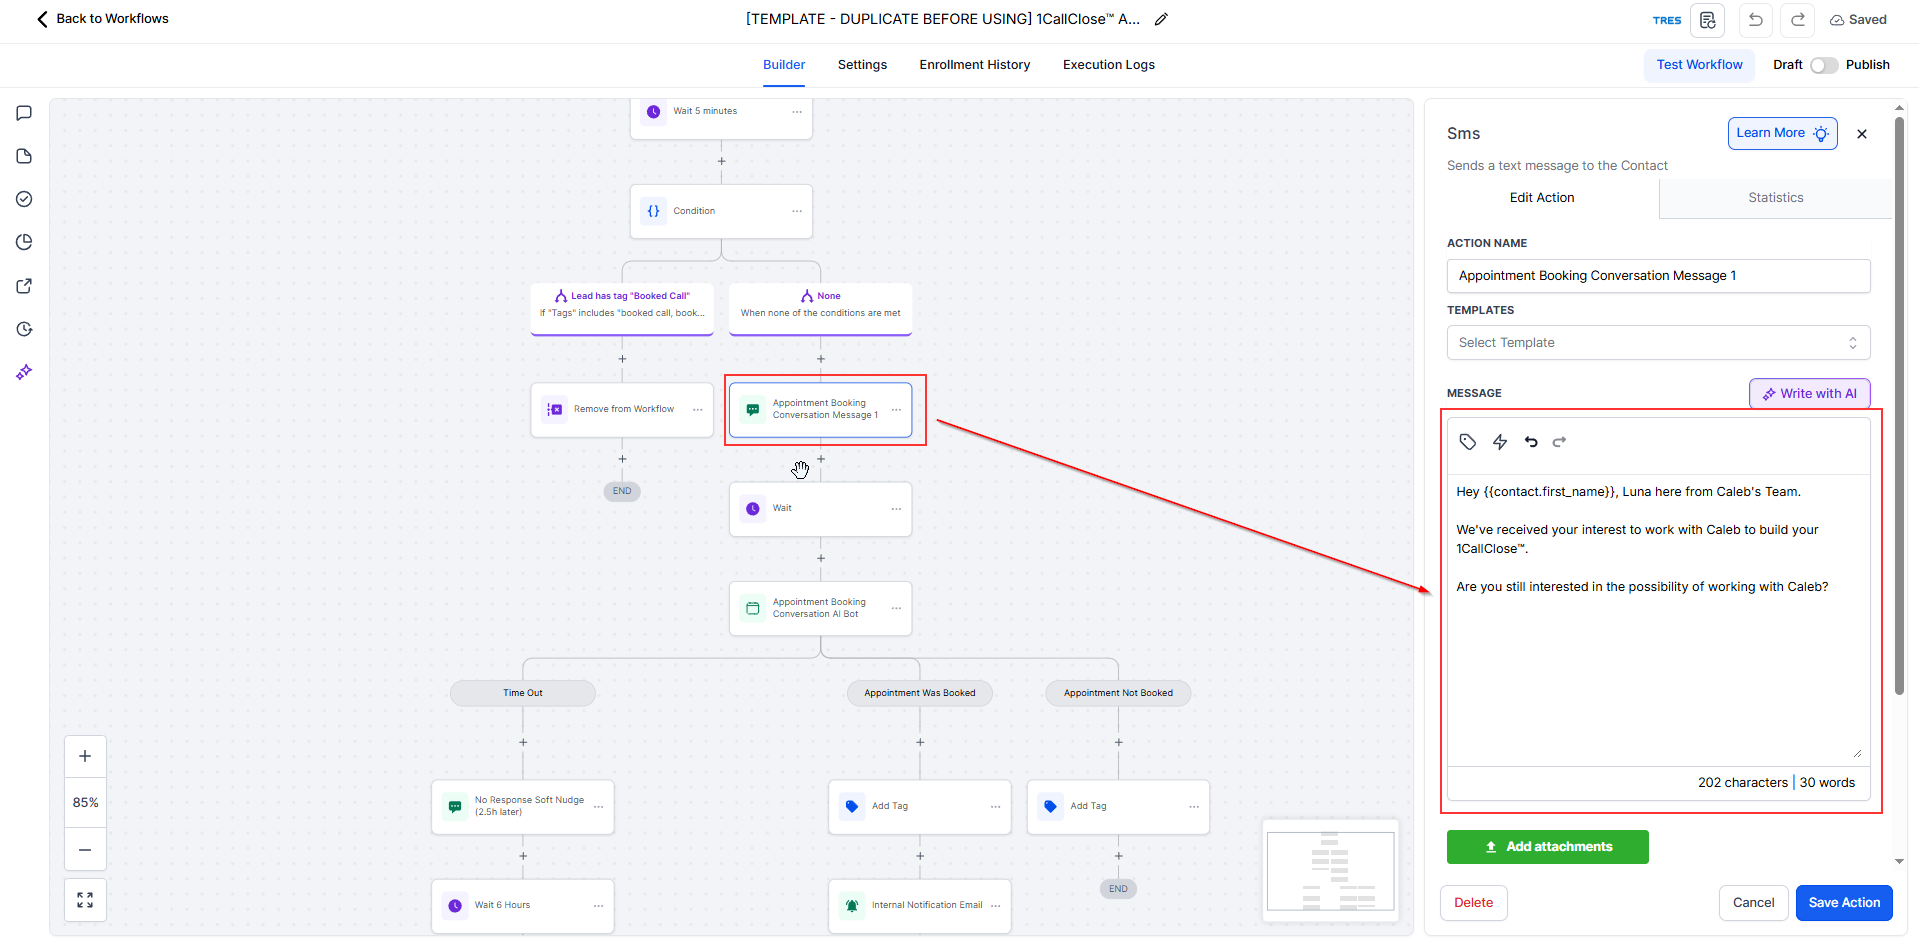
Step 4: Copy the Initial AI Message to the Live Workflow
In your AI Agent Testing Workflow, locate the SMS action:
Appointment Booking Conversation Message 1
Copy:
The message content
Any personalization you added (AI name, company name, tone)
Switch to your Live AI Booking Workflow.
Open the SMS action with the same name:
Appointment Booking Conversation Message 1
Paste the copied content and save.
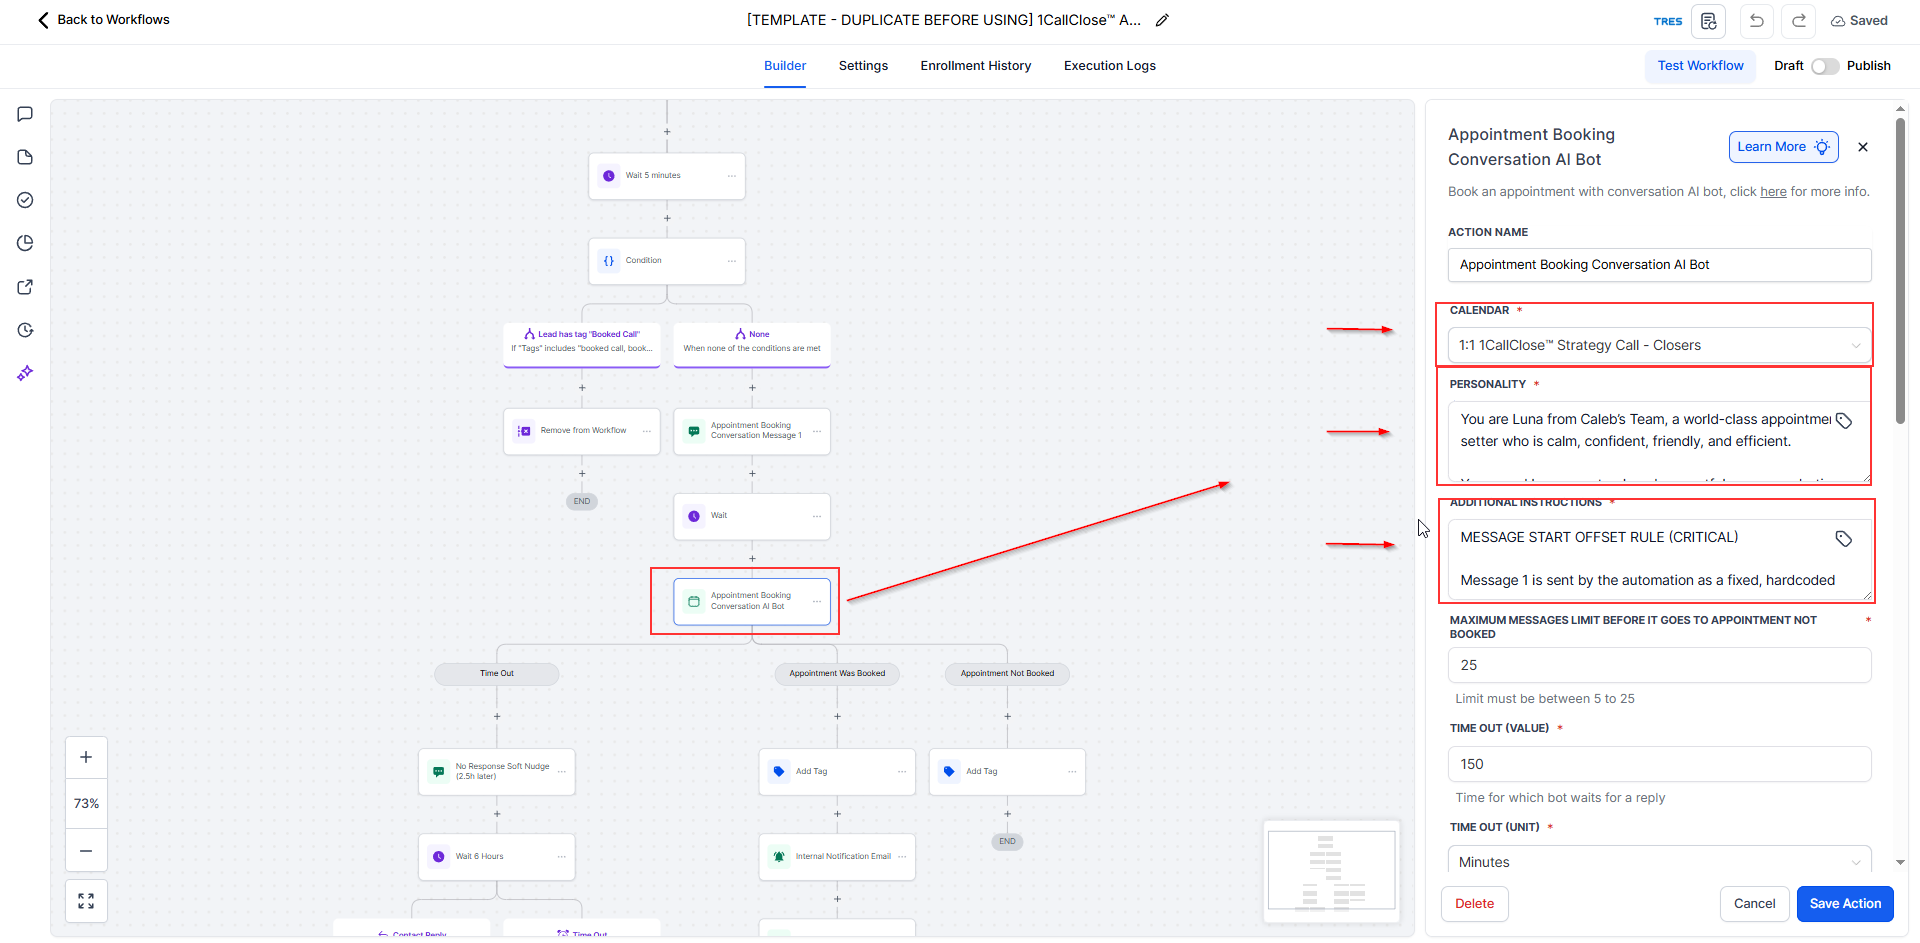
Step 5: Copy the AI Bot Configuration to the Live Workflow
In your Testing Workflow, open the action:
Appointment Booking Conversation AI Bot
Copy all configurations, including:
Selected calendar
Personality settings
Additional Instructions
Switch to the Live AI Booking Workflow.
Open the action with the same name:
Appointment Booking Conversation AI Bot
Paste and save all settings exactly as tested.
Step 6: Configure Appointment Booked Notifications
In the Live AI Booking Workflow, locate the condition branch:
Appointment Was Booked
Configure who should receive booking notifications:
Yourself, or
A specific team member (sales, admin, or closer)
Update the email recipient(s) accordingly and save.

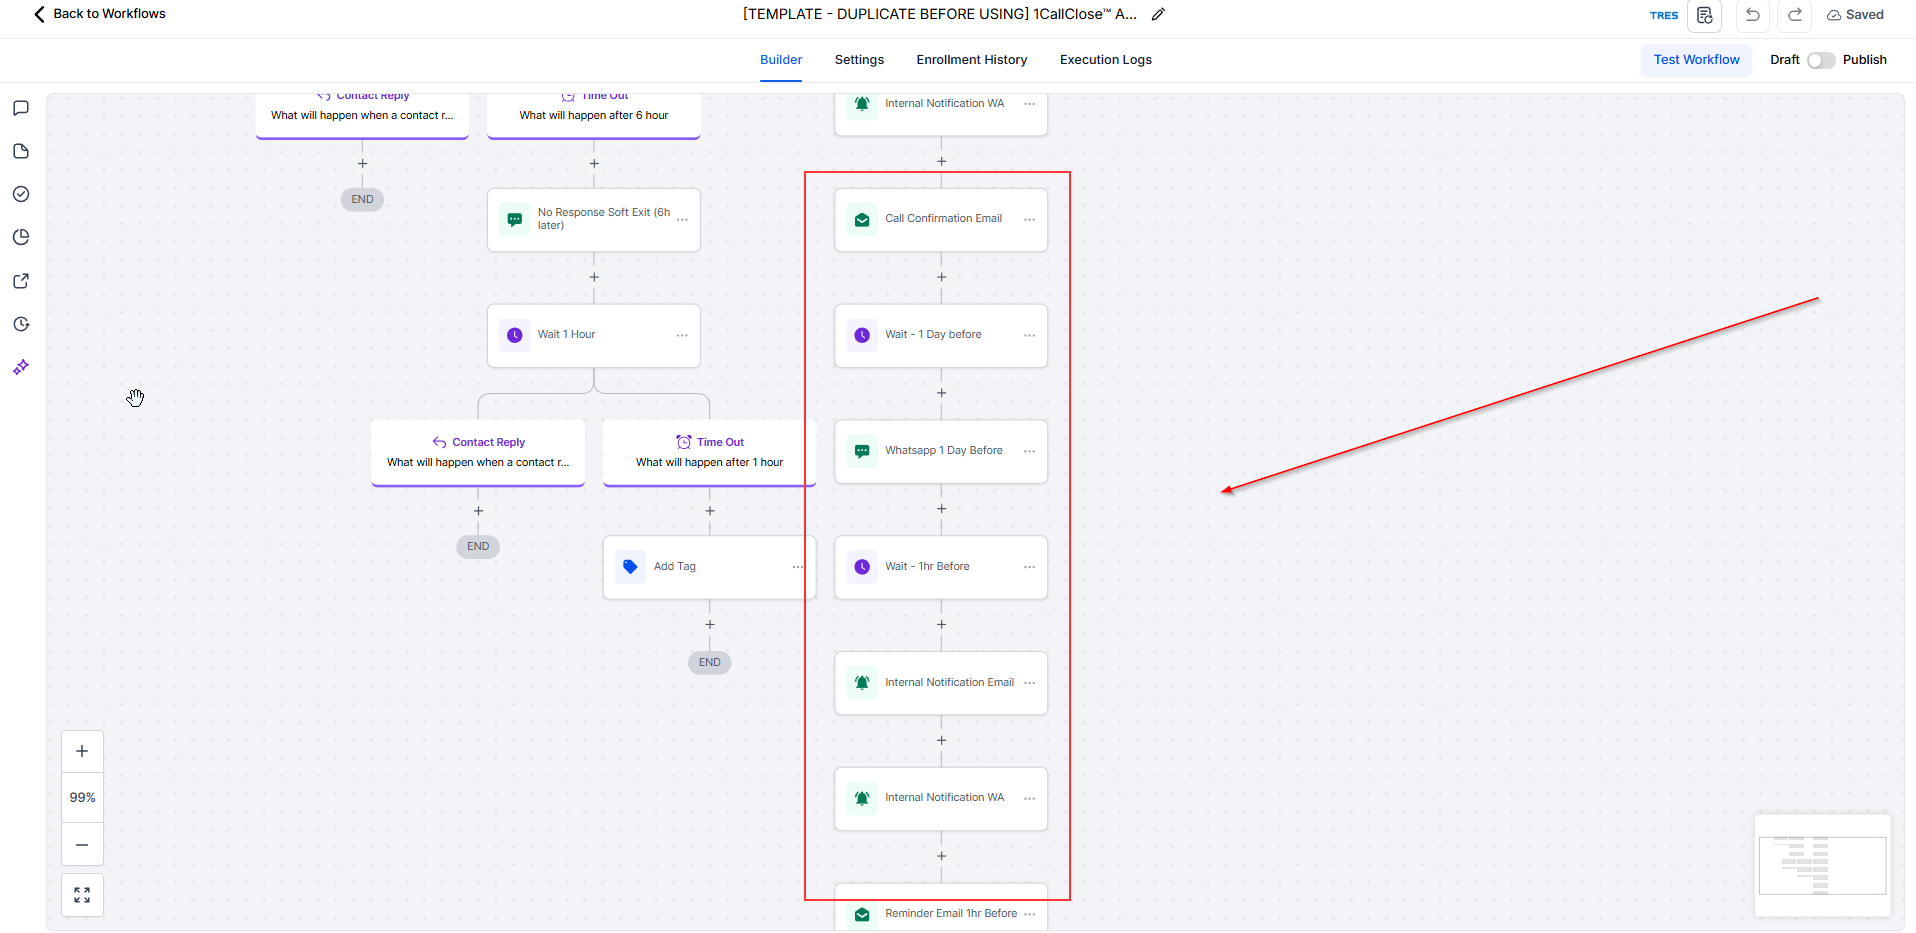
Step 7: Create the Appointment Follow-Up Email
Inside the Appointment Was Booked path, add or edit the email action.
Create your follow-up email copy to:
Confirm the appointment
Set expectations
Reinforce next steps
Review the email content carefully before saving.
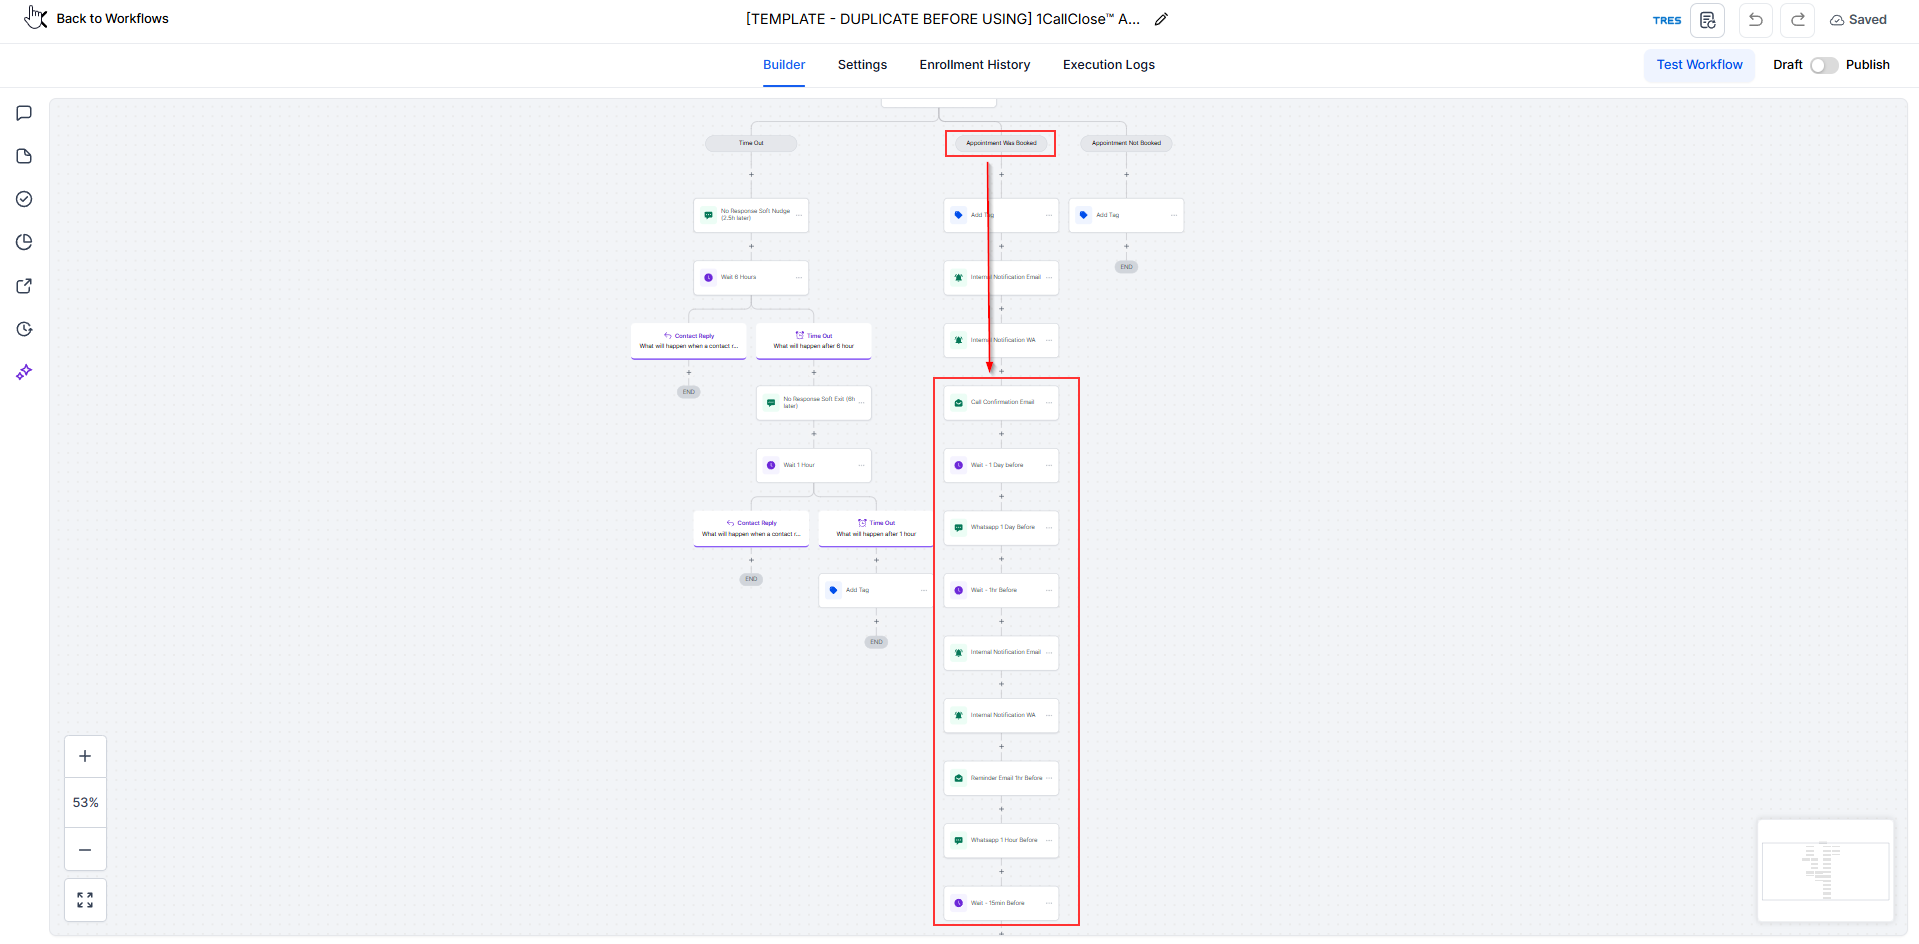
Zoomed version