WhatsApp templates fall under two main categories:
Marketing Template
Used for promotional or broadcast-style messages (e.g., webinar reminders, offers)
Utility Template
Used for transactional updates (e.g., confirmations, reminders tied to a user action)
Marketing template: $0.0634 per message
Utility template: $0.0081 per message
✅ Template messages are used to start or restart a conversation after 24 hours — and they cost money.
✅ Session messages are follow-up messages within 24 hours of the customer replying to your template — these are free.

This template will be the first WhatsApp message sent by your AI workflow.
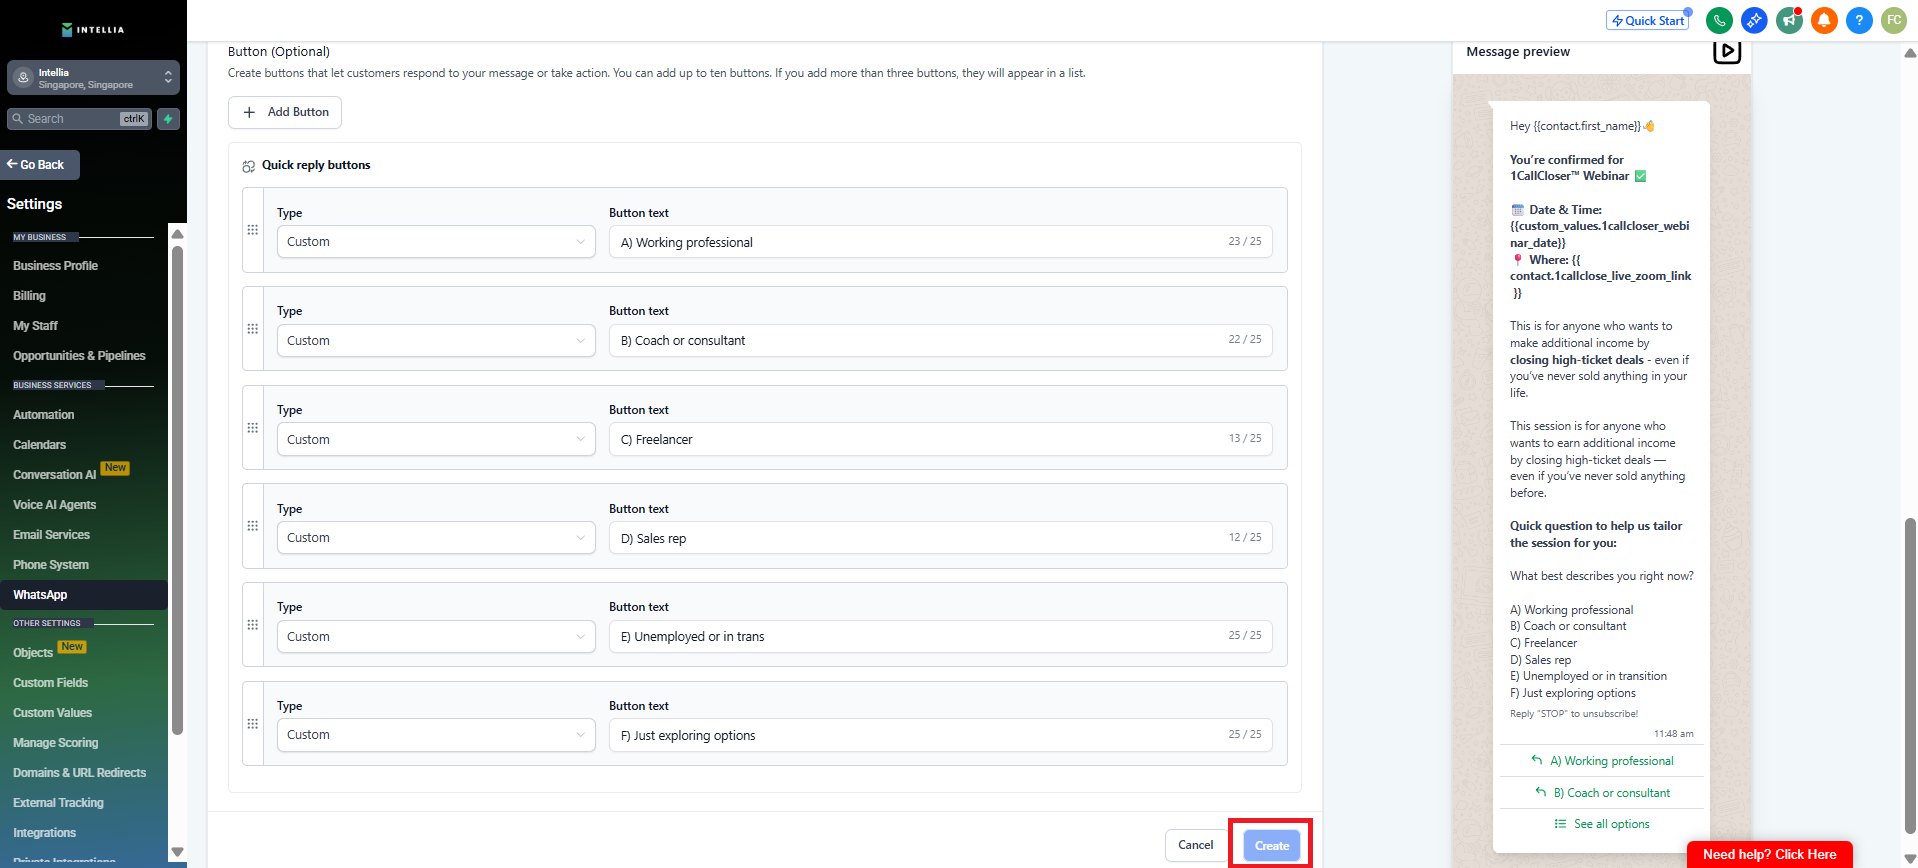
Go to WhatsApp Templates
Create a new template
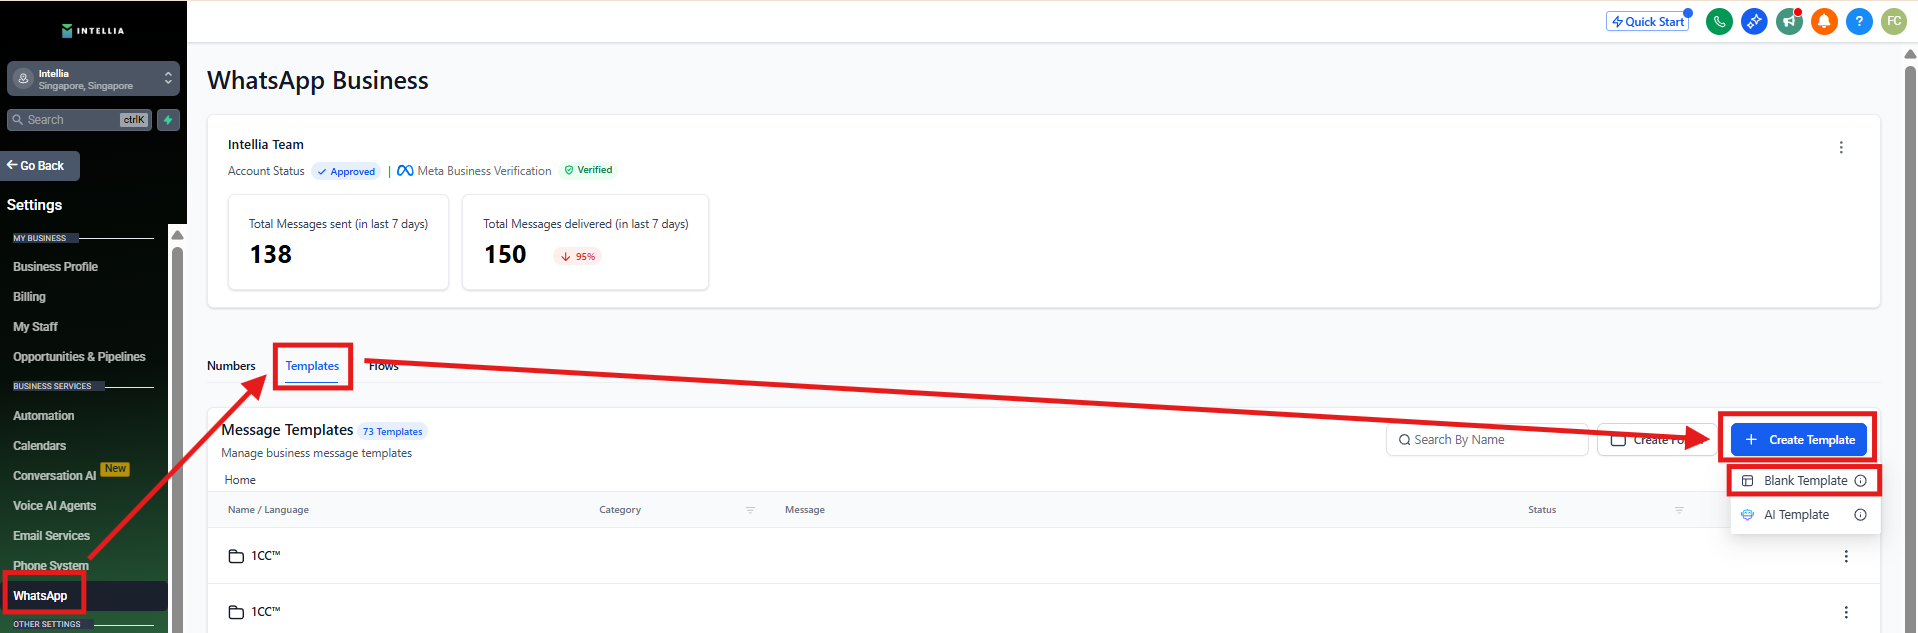
Under Body, use the copy below (you can personalize it)
Copy (Body):
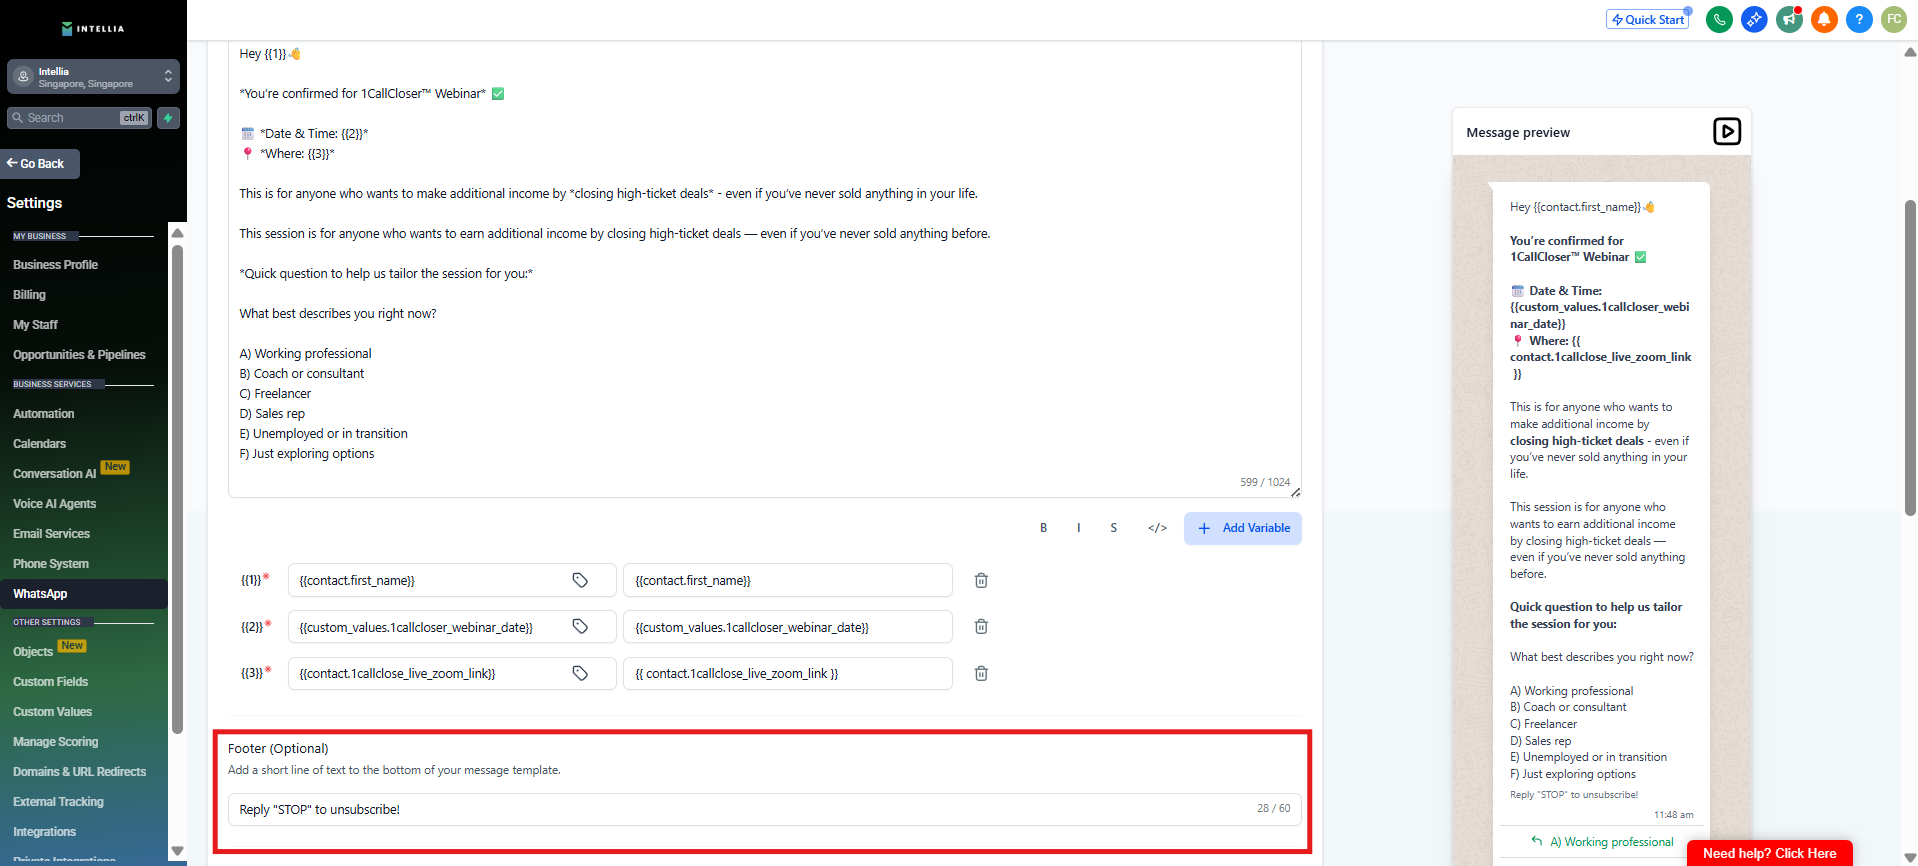
Hey {{1}}👋
You’re confirmed for 1CallCloser™ Webinar ✅
🗓 Date & Time: {{2}}
📍 Where: {{3}}
This session is for anyone who wants to earn additional income by closing high-ticket deals — even if you’ve never sold anything before.
Quick question to help us tailor the session for you:
What best describes you right now?
A) Working professional
B) Coach or consultant
C) Freelancer
D) Sales rep
E) Unemployed or in transition
F) Just exploring options
✅ You can copy everything and just adjust wording so it matches your business, offer, and brand voice.
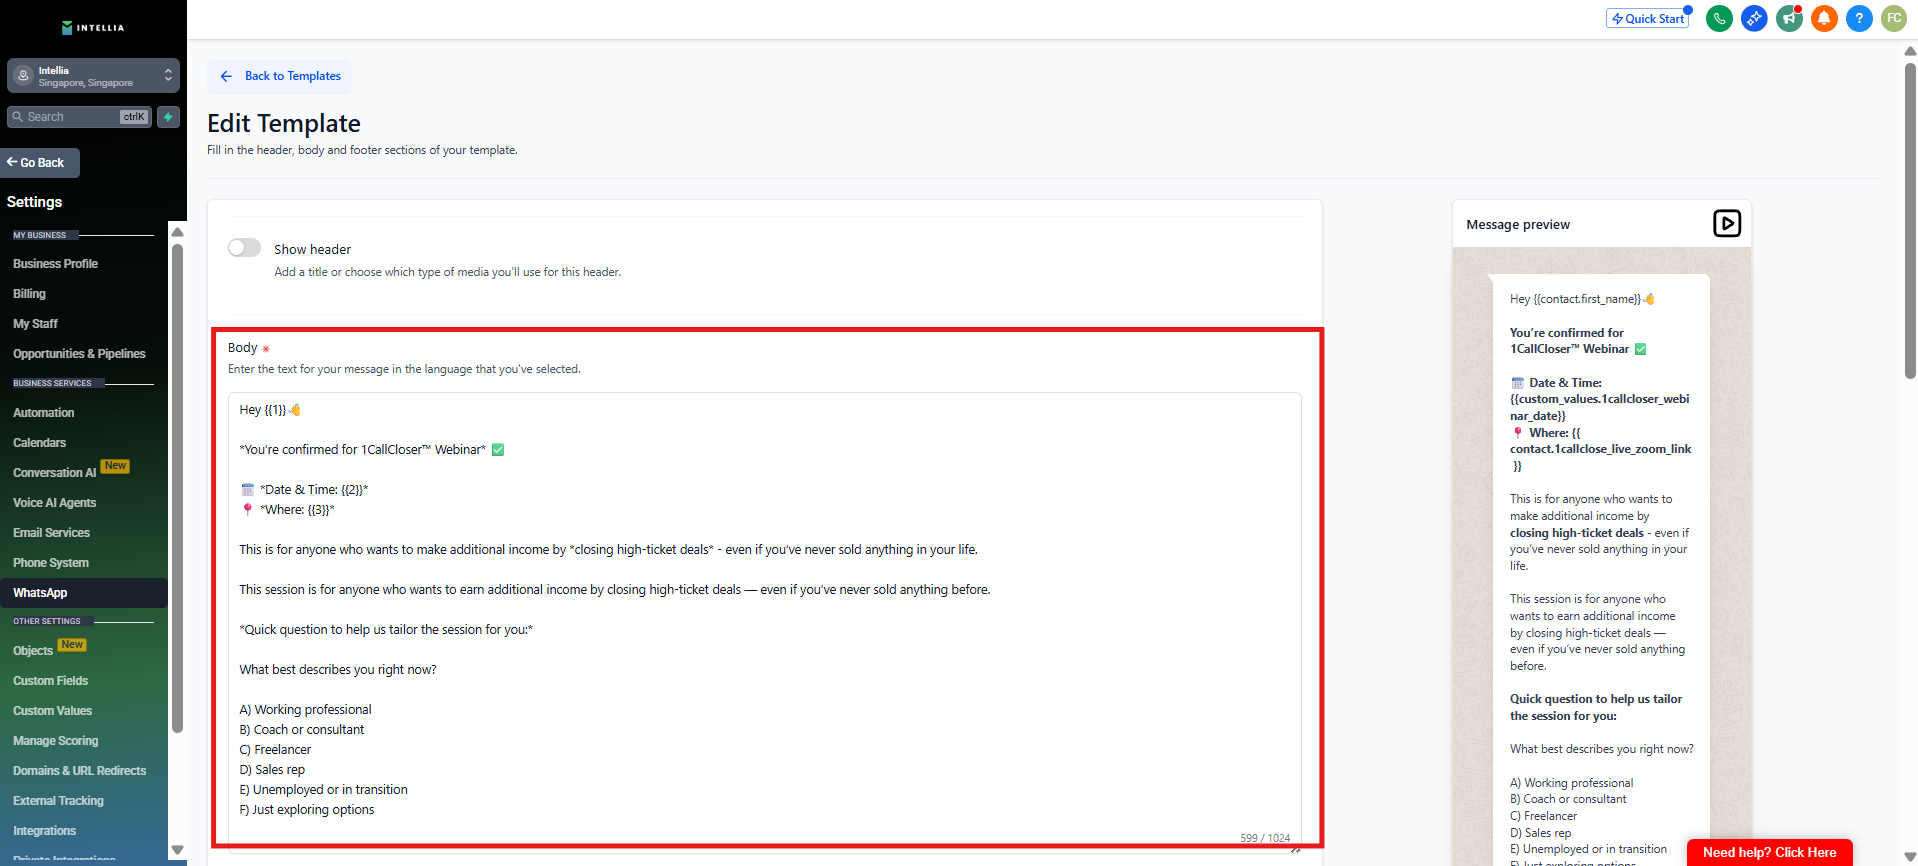
Custom values are placeholders that auto-fill the template with the right information for each contact.
{{1}} = the contact’s name (e.g., First Name)
{{2}} = the webinar date & time
{{3}} = the webinar location/link (e.g., Zoom link)
So instead of manually typing these every time, the system inserts the correct values automatically when the message is sent.
Set your footer to:
Reply "STOP" to unsubscribe!
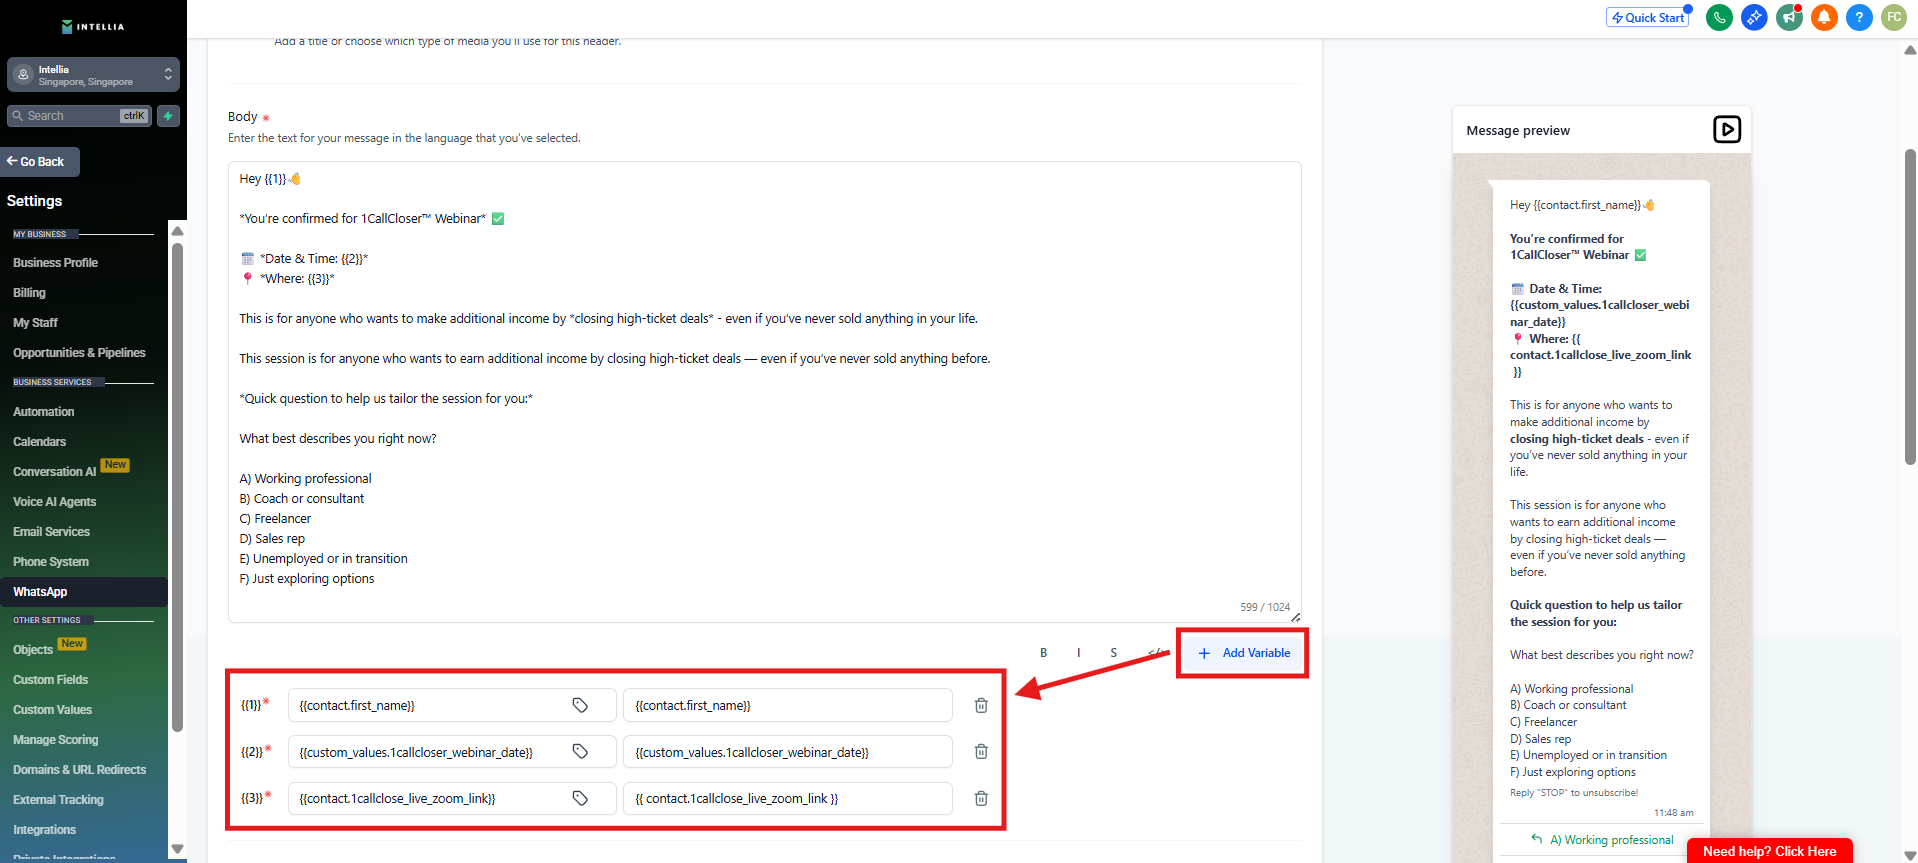
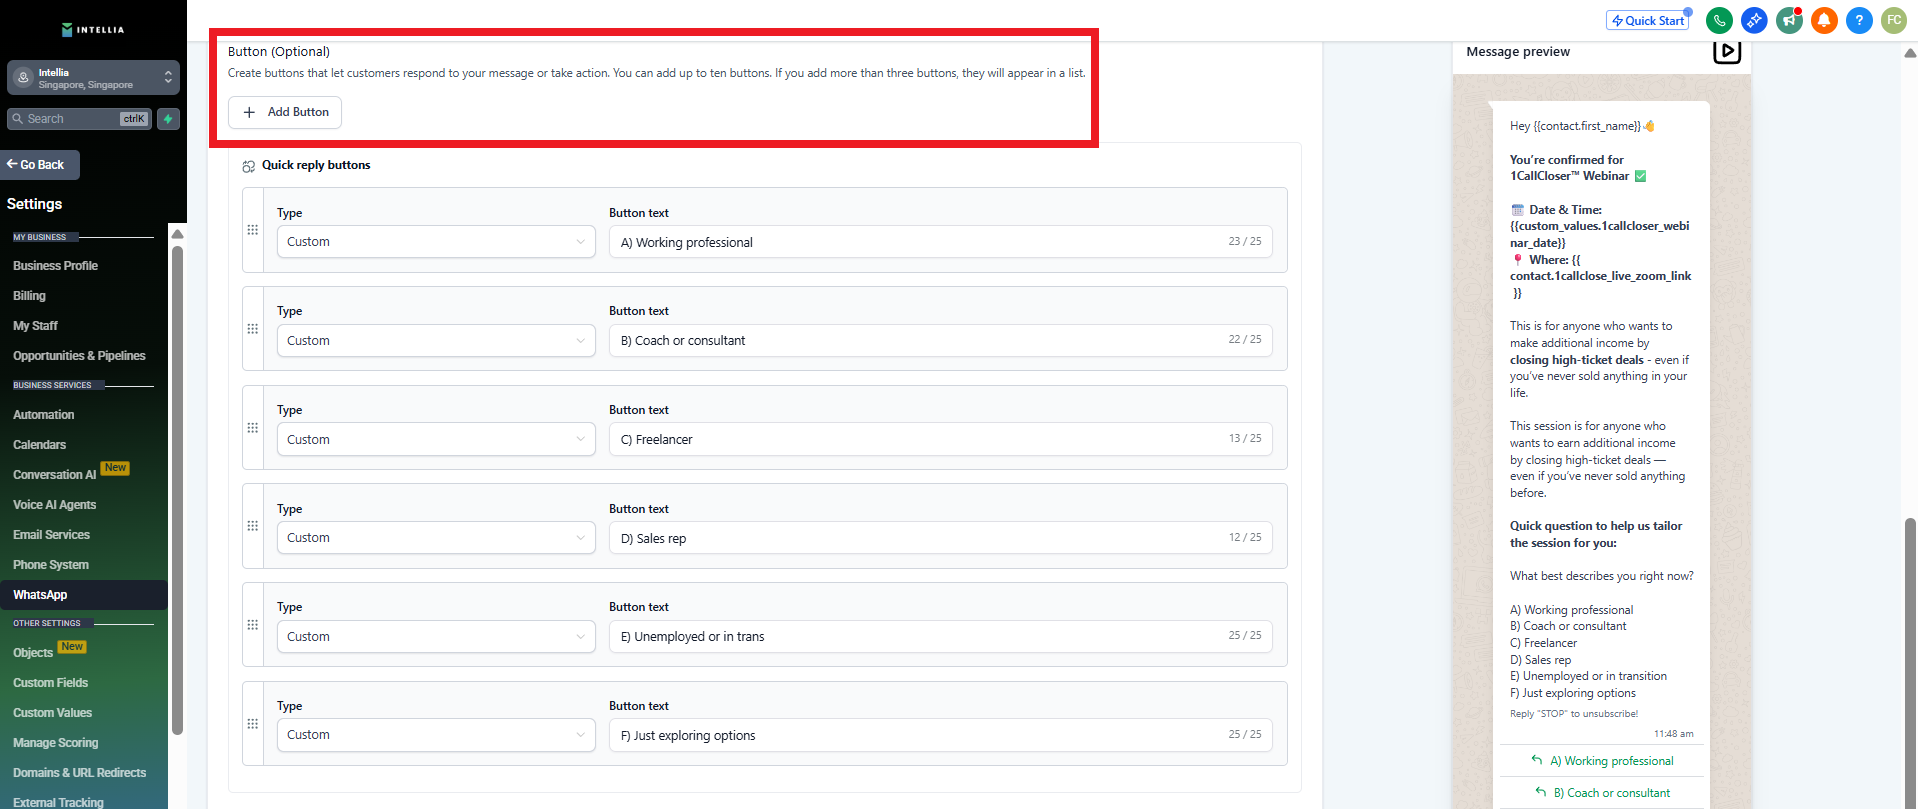
Add a Custom Button
Choose a button text that fits your question flow (based on what you want them to click/respond with)
Review the template formatting
Save the template once done