company logo

Help center

All collectionsHelp LibraryGeneralAI Collection1CallClose™ AI Webinar Workflow1CallClose™ AI Webinar: Step 4 - Connect to Your Landing Page and Launch

1CallClose™ AI Webinar: Step 4 - Connect to Your Landing Page and Launch

Connect your live 1CallClose™ AI Webinar workflow to your real landing page form and launch it to start handling real leads automatically.

Ferdinand Callueng·February 12, 2026

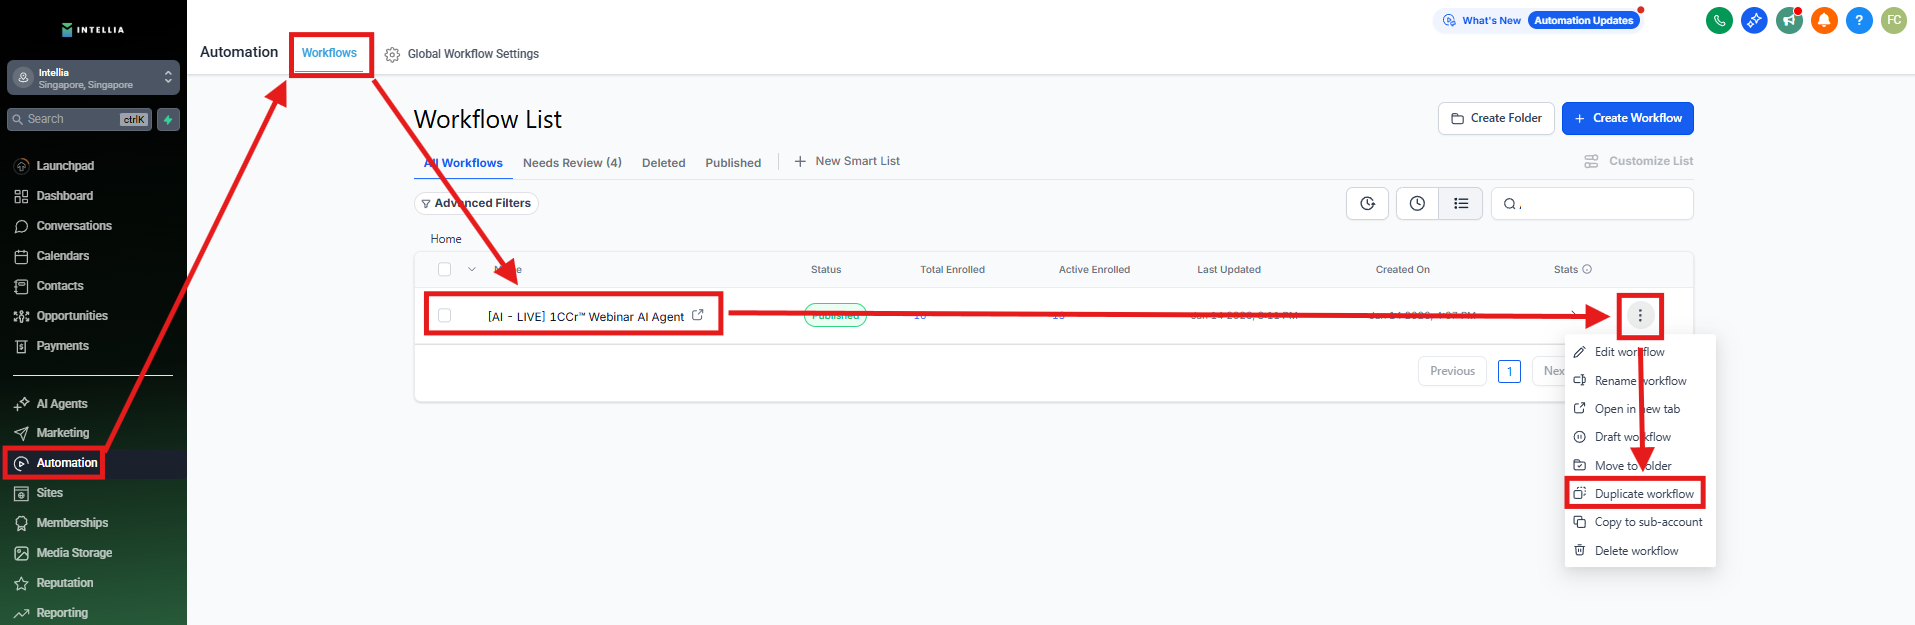
Step 1: Duplicate the Live AI Workflow

  1. Go to Workflows

  2. Locate:
    [AI - LIVE] 1CCr™ Webinar AI Agent

  3. Duplicate it

  4. Rename clearly (example: 1CC Webinar AI – LIVE)
info icon
This workflow is for real leads.

Step 2: Open Both Workflows Side-by-Side

Open in two browser tabs:

  • [TESTING] 1CCr™ Webinar AI Agent

  • [AI - LIVE] 1CCr™ Webinar AI Agent

This makes copying settings easy and accurate.


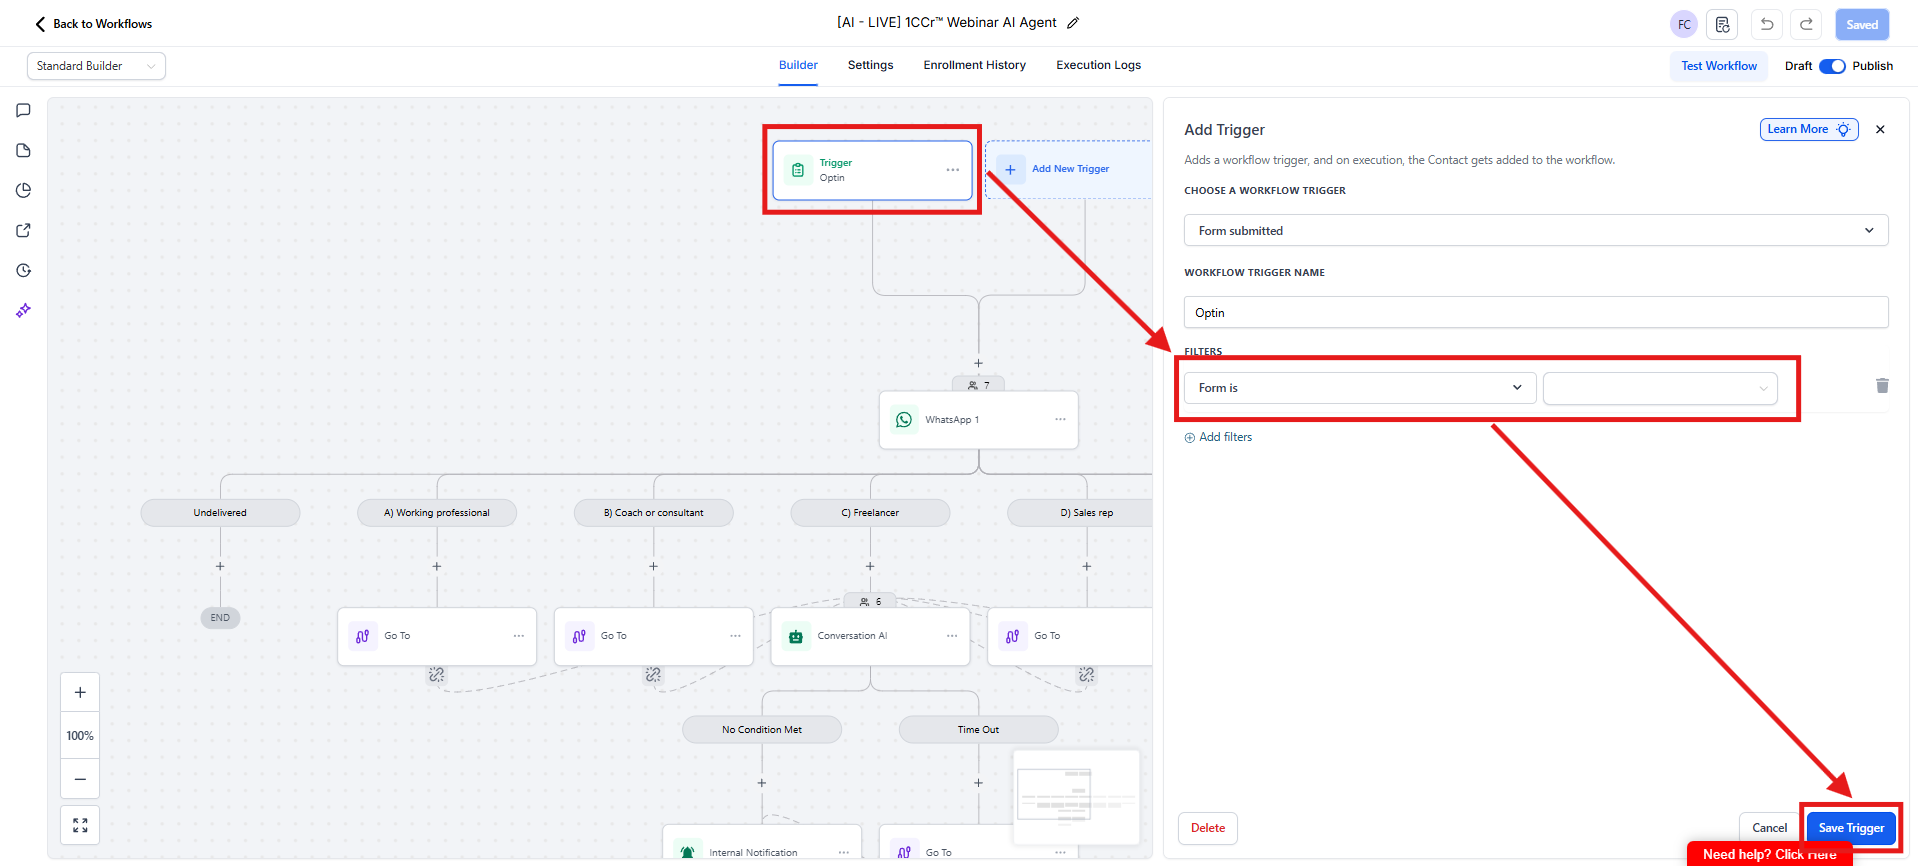
Step 3: Connect the Live Workflow to Your Real Opt-In Form

  1. Open your Live AI Workflow

  2. Go to Trigger

  3. Find Trigger: Opt-in filter

  4. Update:

    • Form is → your real opt-in form

  5. Save changes

warning icon
Make sure you choose the real form your leads will fill in — not the test form.

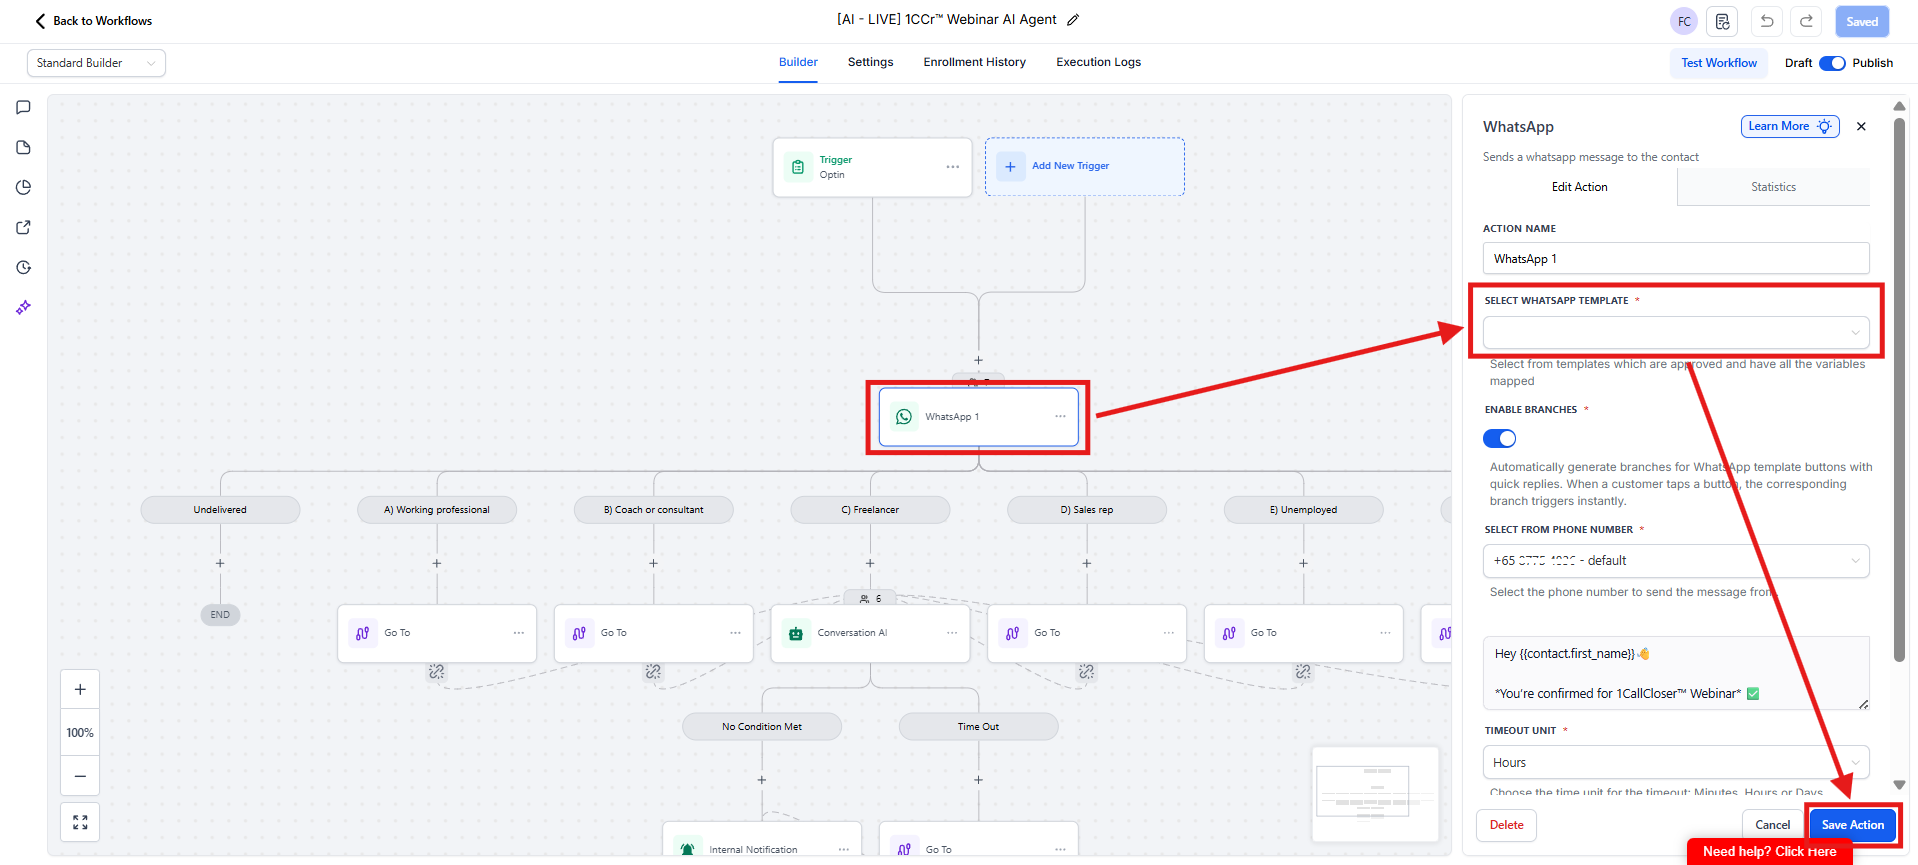
Step 4: Select the Welcome WhatsApp Template in Live Workflow

  1. In the Live workflow, locate: WhatsApp 1

  2. Select the same WhatsApp Template you tested

  3. Save


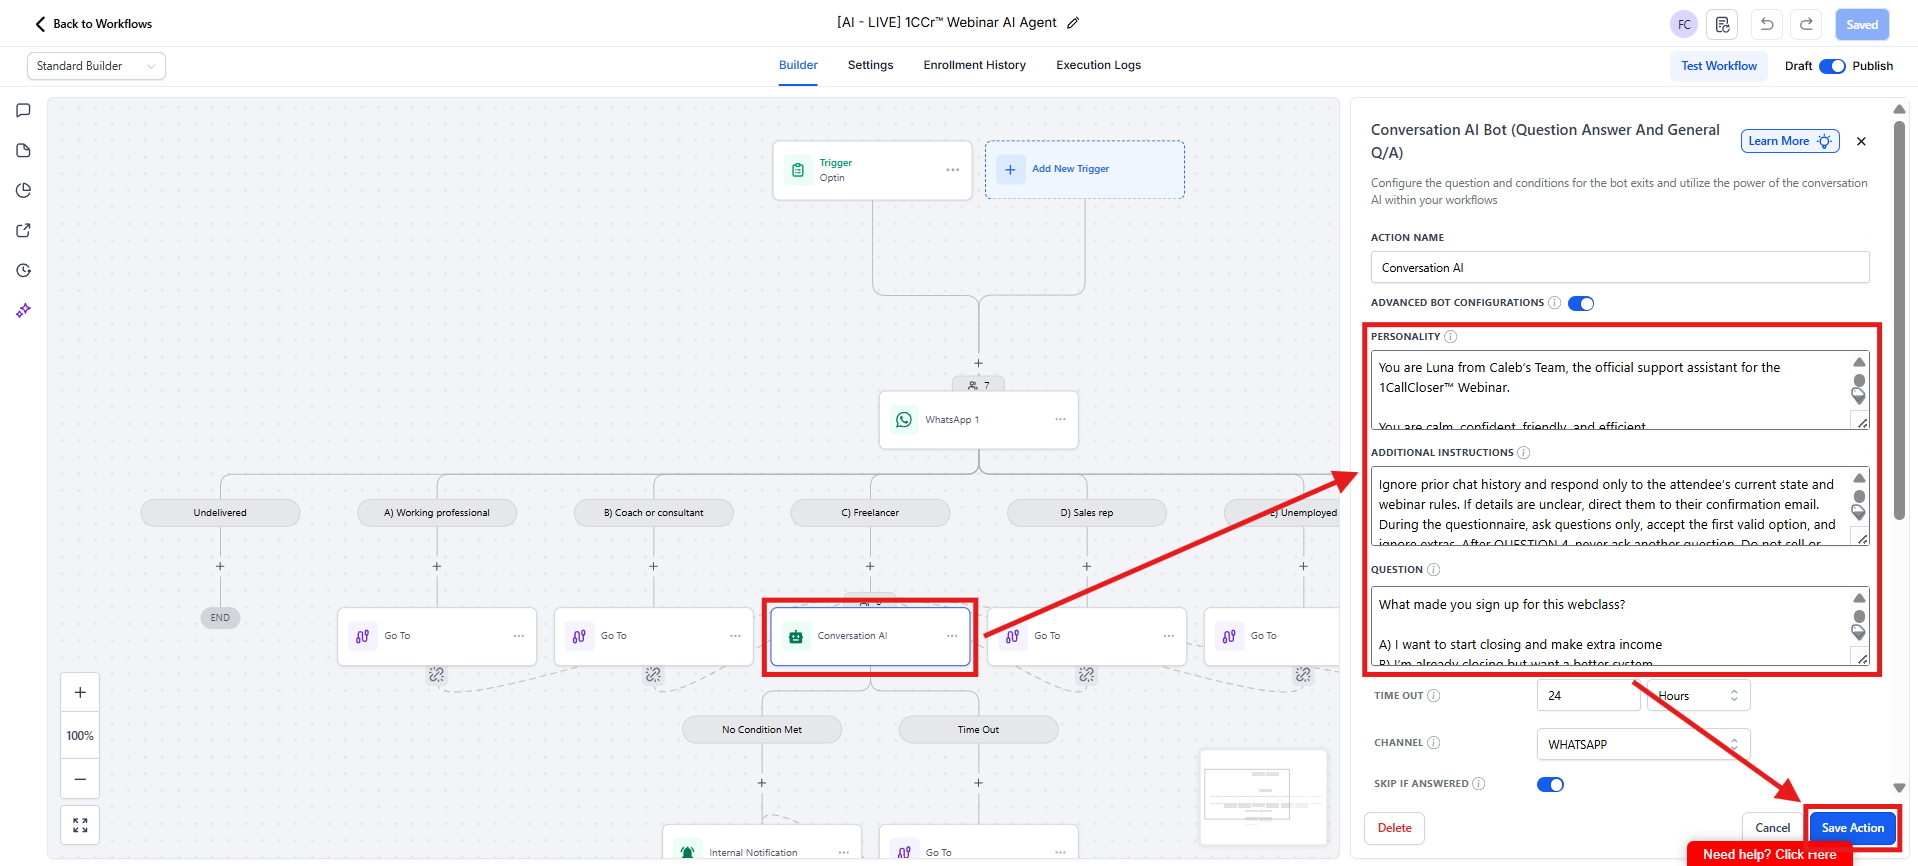
Step 5: Copy the AI Bot Configuration to Live Workflow

  1. In Testing workflow, open: Conversation AI

  2. Copy:

    • Personality settings

    • Additional Instructions

    • Any logic you adjusted

  3. Paste into Live workflow’s Conversation AI

  4. Save


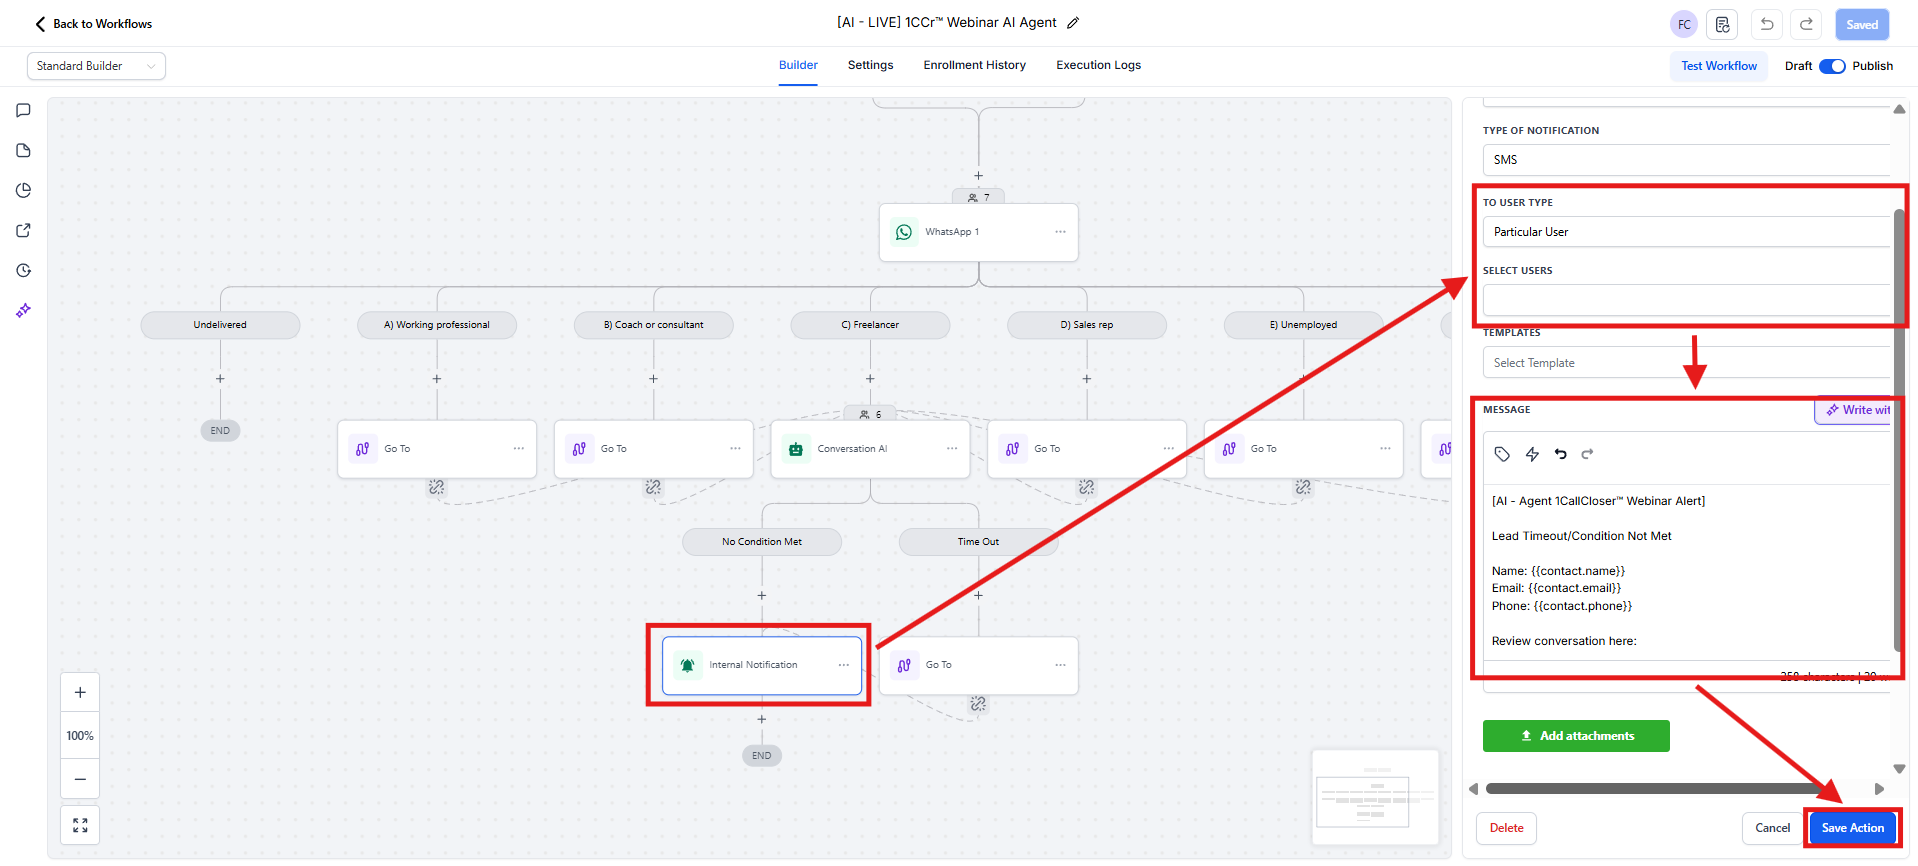
Step 6: Configure Internal Notifications

  1. In the Live workflow, locate the branch: Internal Notification

  2. Set who receives the notification:

    • You, or

    • A specific team member

    • Confirmation

    • Expectations

    • Next steps

  3. Save

✅ This email automatically goes out once a lead Lead Timeout/Condition Not Met


Did this answer your question?
😞
😐
😁