

Goal
Test end-to-end before going live.
Step 4.1 — Submit the form
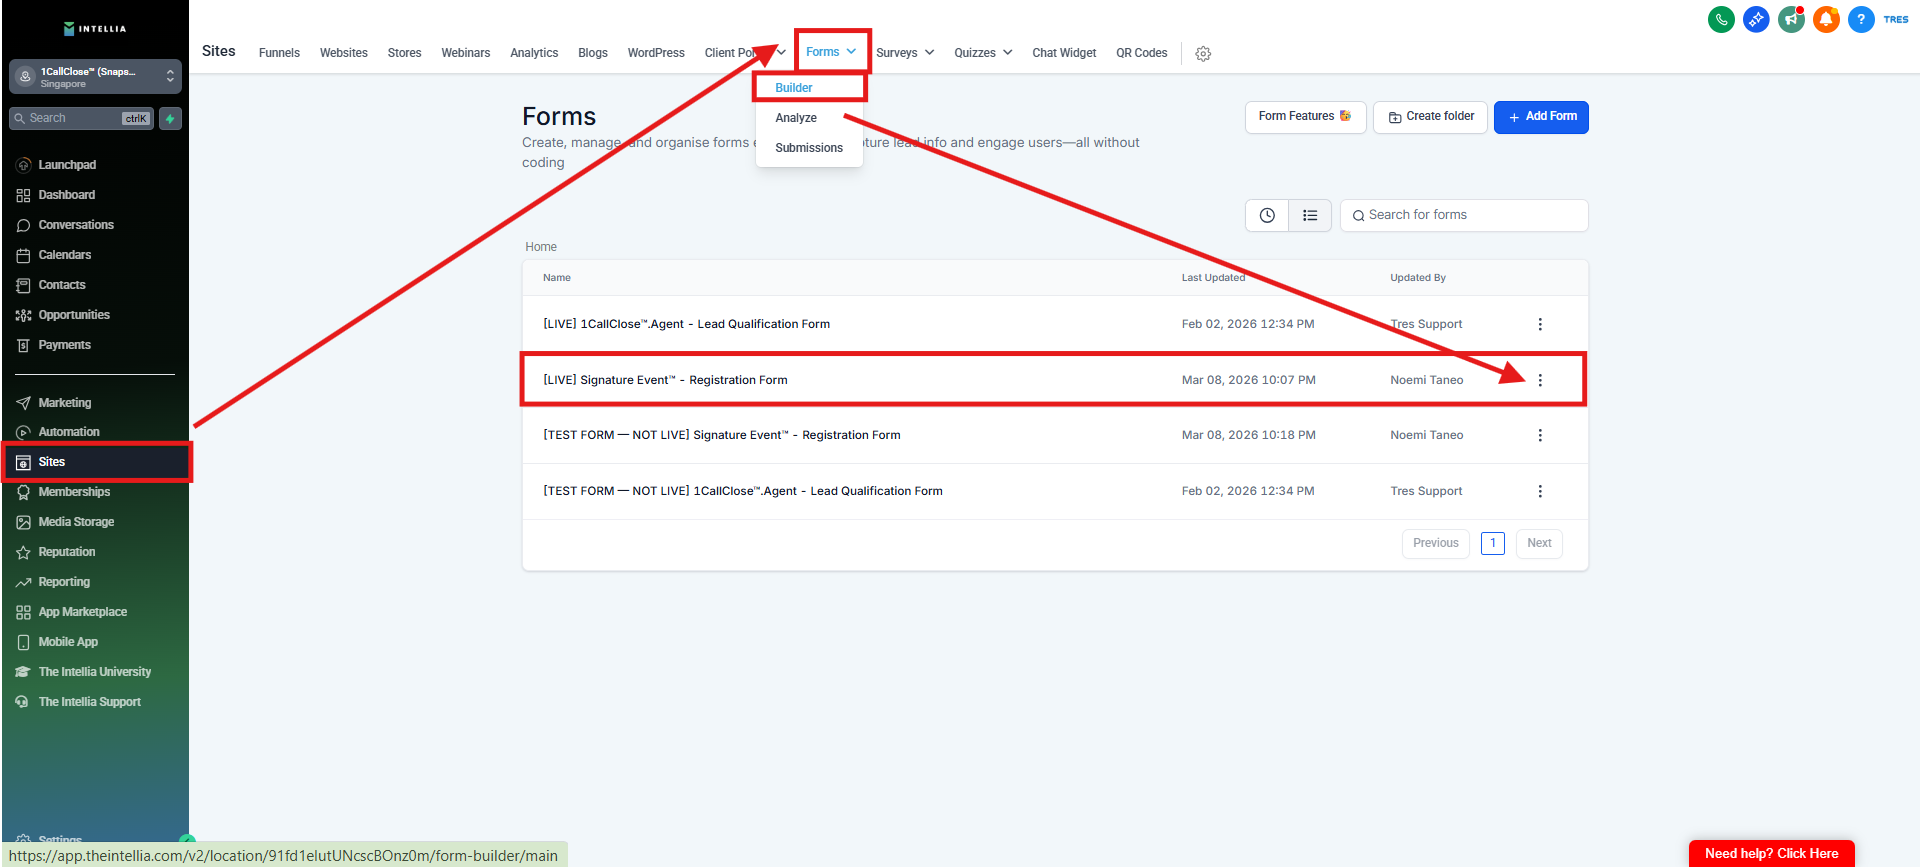
Go to Sites> Form builder > find the form
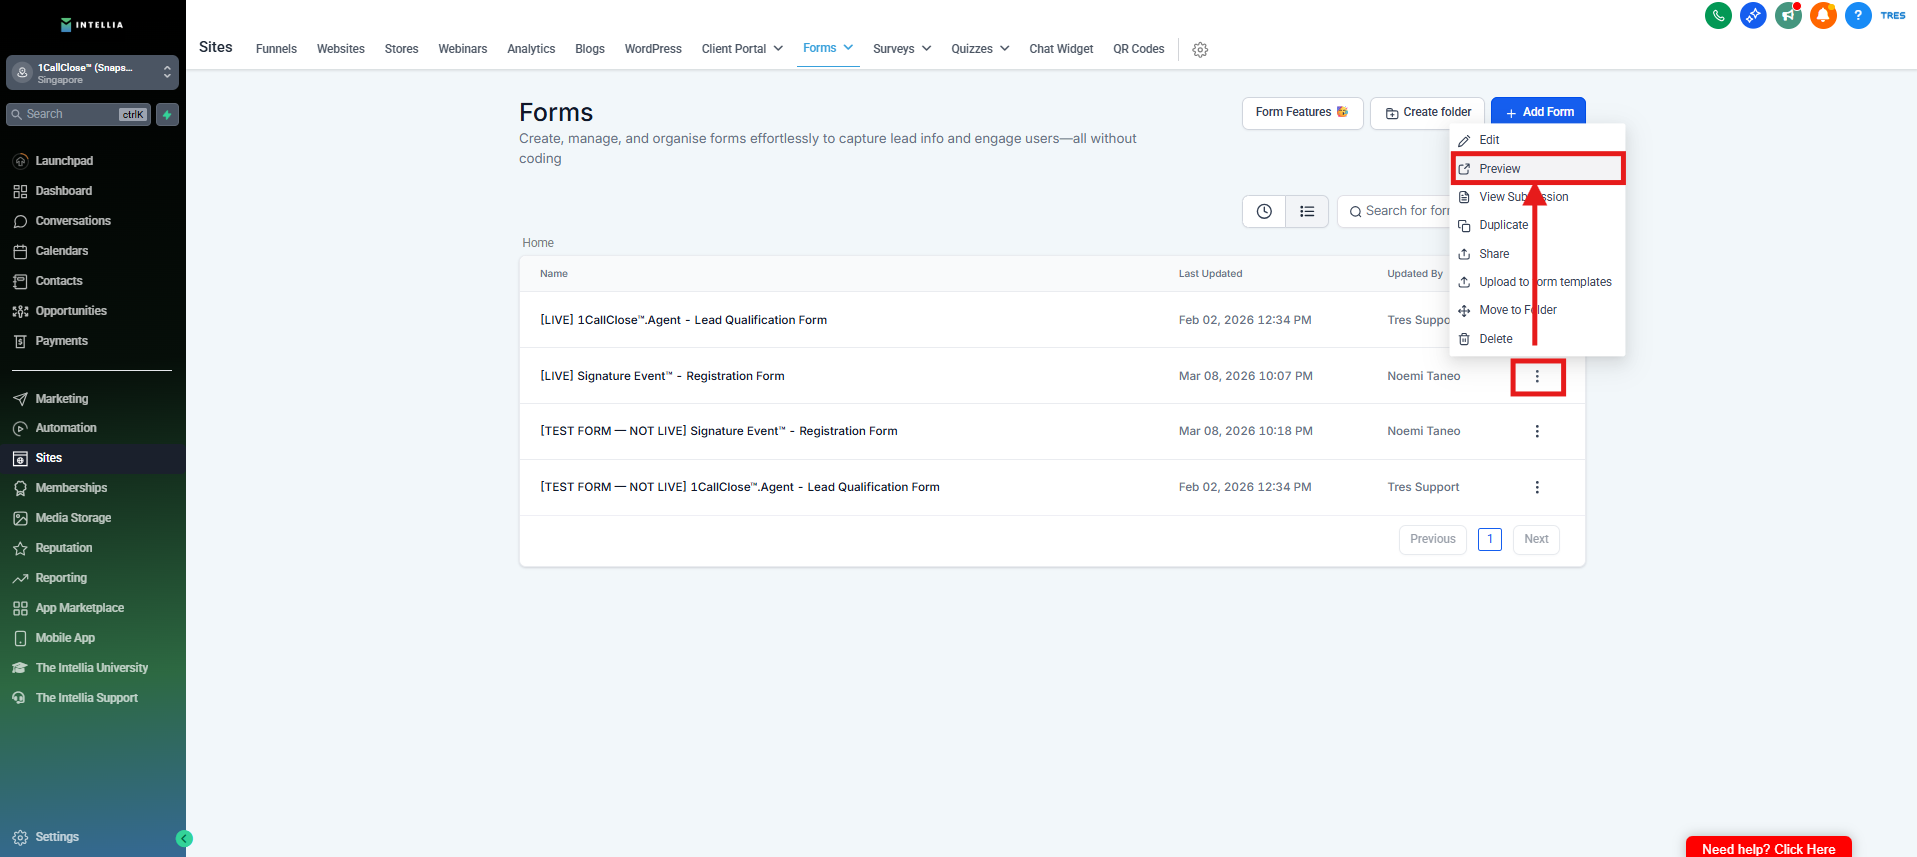
Once you found the form click the 3 dot
Click Preview
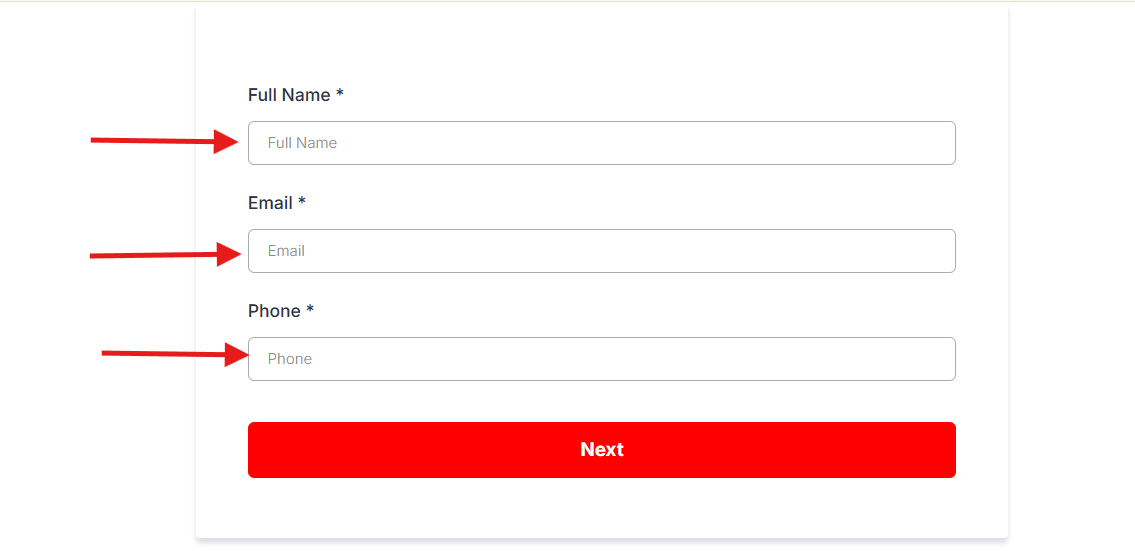
Submit using:
Your real contact details
A valid WhatsApp number
1. Why do I need to publish the workflow before testing?
Publishing makes the workflow live so the automation can actually run when the form is submitted. If the workflow is still unpublished, the Agent will not trigger and no messages will be sent.
2. How should I submit the form for testing?
Open the form from Sites > Form Builder, click the 3-dot menu, then select Preview. Submit the form using your real contact details and a valid WhatsApp number so you can test the full conversation flow properly.
3. What scenarios should I test when chatting with the Agent?
At minimum, test these common replies:
“How much is it?”
“Send me details”
“I’m busy”
“Is this legit?”
“I need to think”
These help you check whether the Agent handles common webinar objections and interest signals correctly.
4. What should I verify during the test?
Make sure the Agent is:
Asking relevant pre-webinar questions
Guiding the contact toward attending the webinar live
Sending short, human-sounding replies
Answering webinar-related questions clearly and correctly
Reinforcing the value of the webinar without sounding pushy
5. What should I do if the Agent’s replies feel off?
Go back to the Additional Instructions, update the guidance, click Save, and test again. Repeat this until the conversation flow feels natural and aligned with your webinar goal.