Step 1 : Login your Intellia Account, Using this link : app.theintellia.com
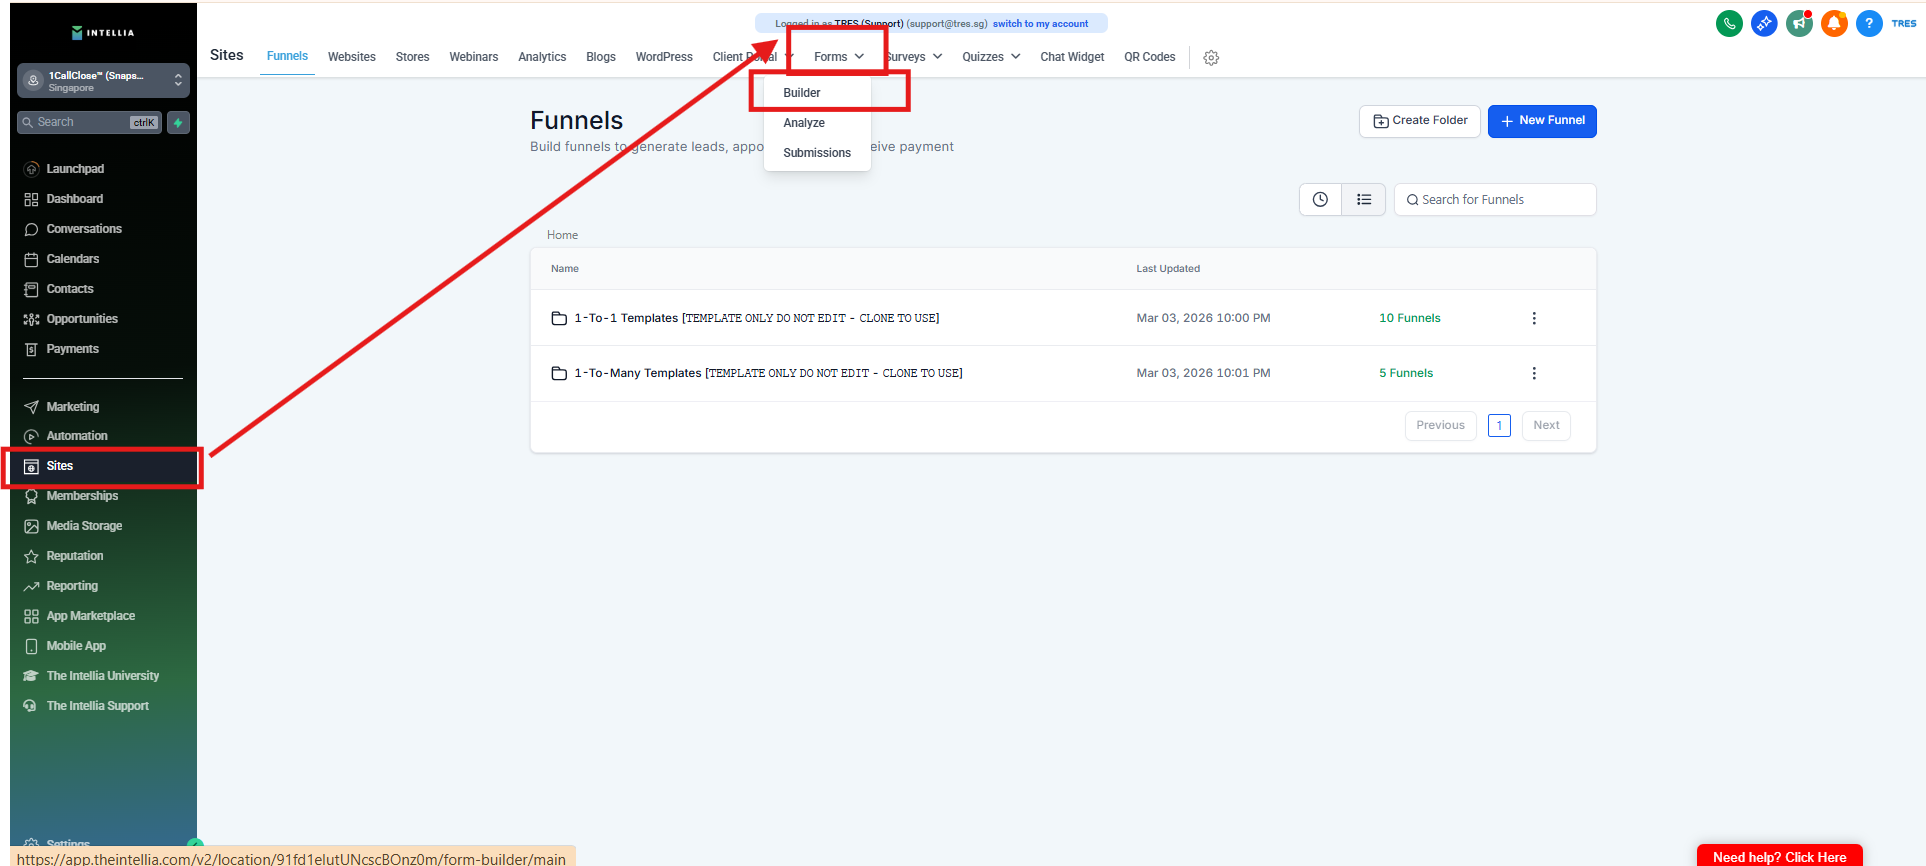
Step 2 : Go to Sites > Click the Forms then Builder
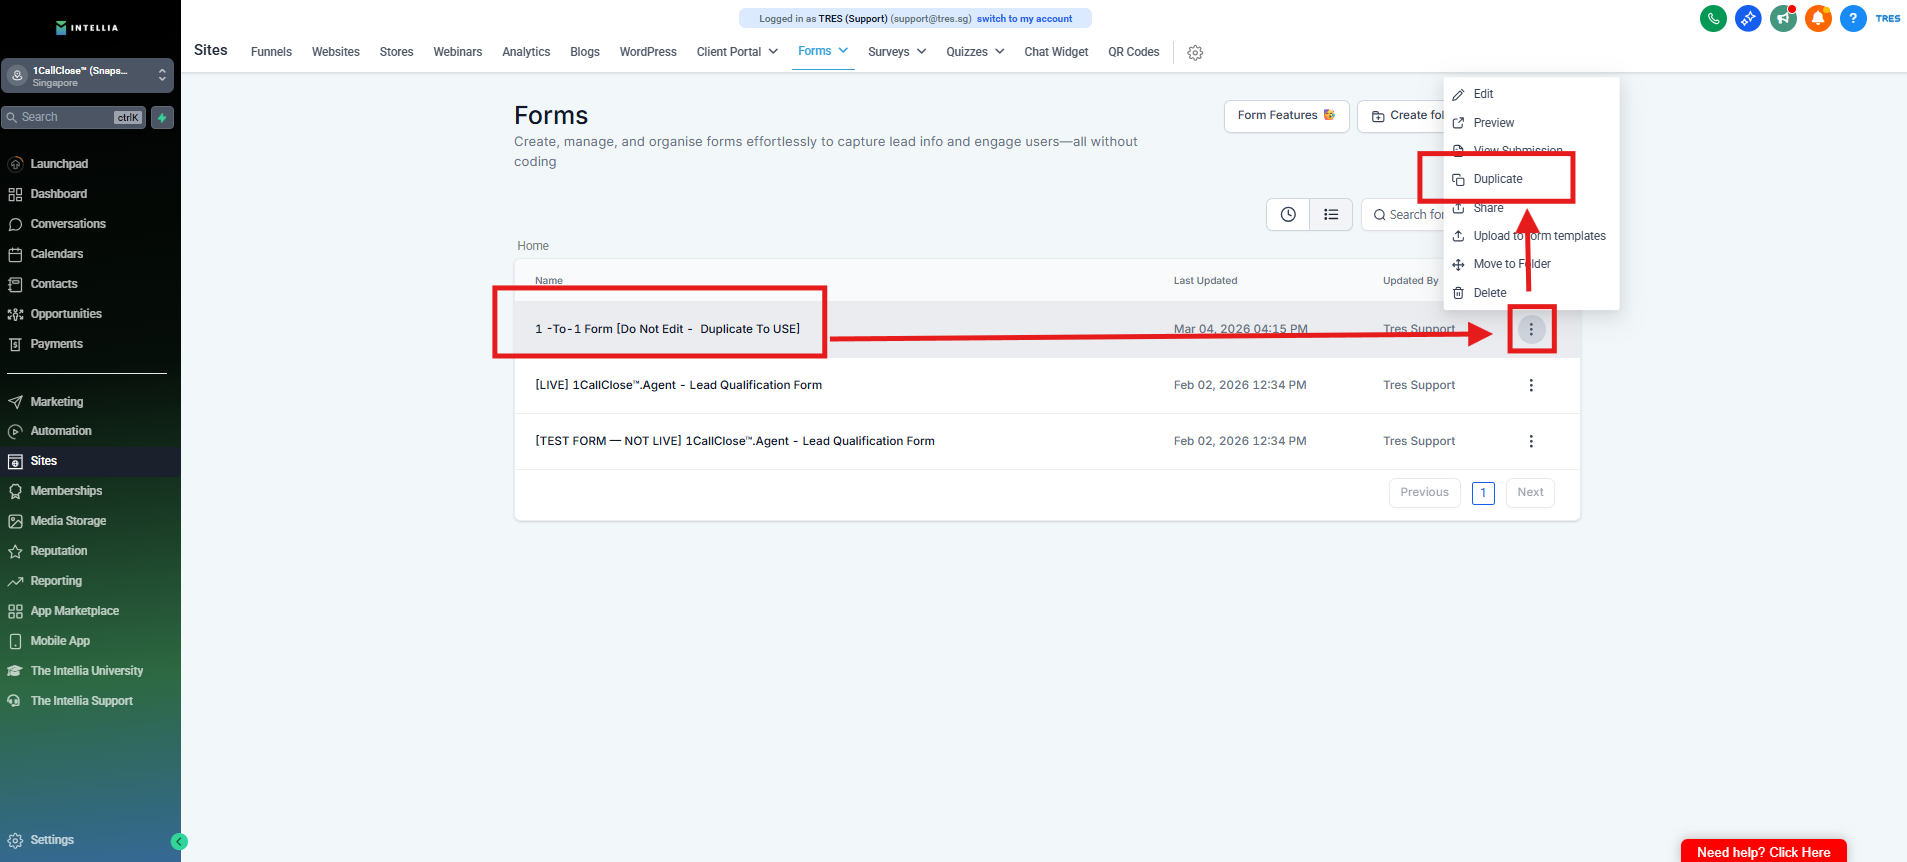
Step 3 : Look for the Webinar Form [Do Not Edit - Duplicate To USE] > Click the 3 little dots Icon > Click Duplicate.
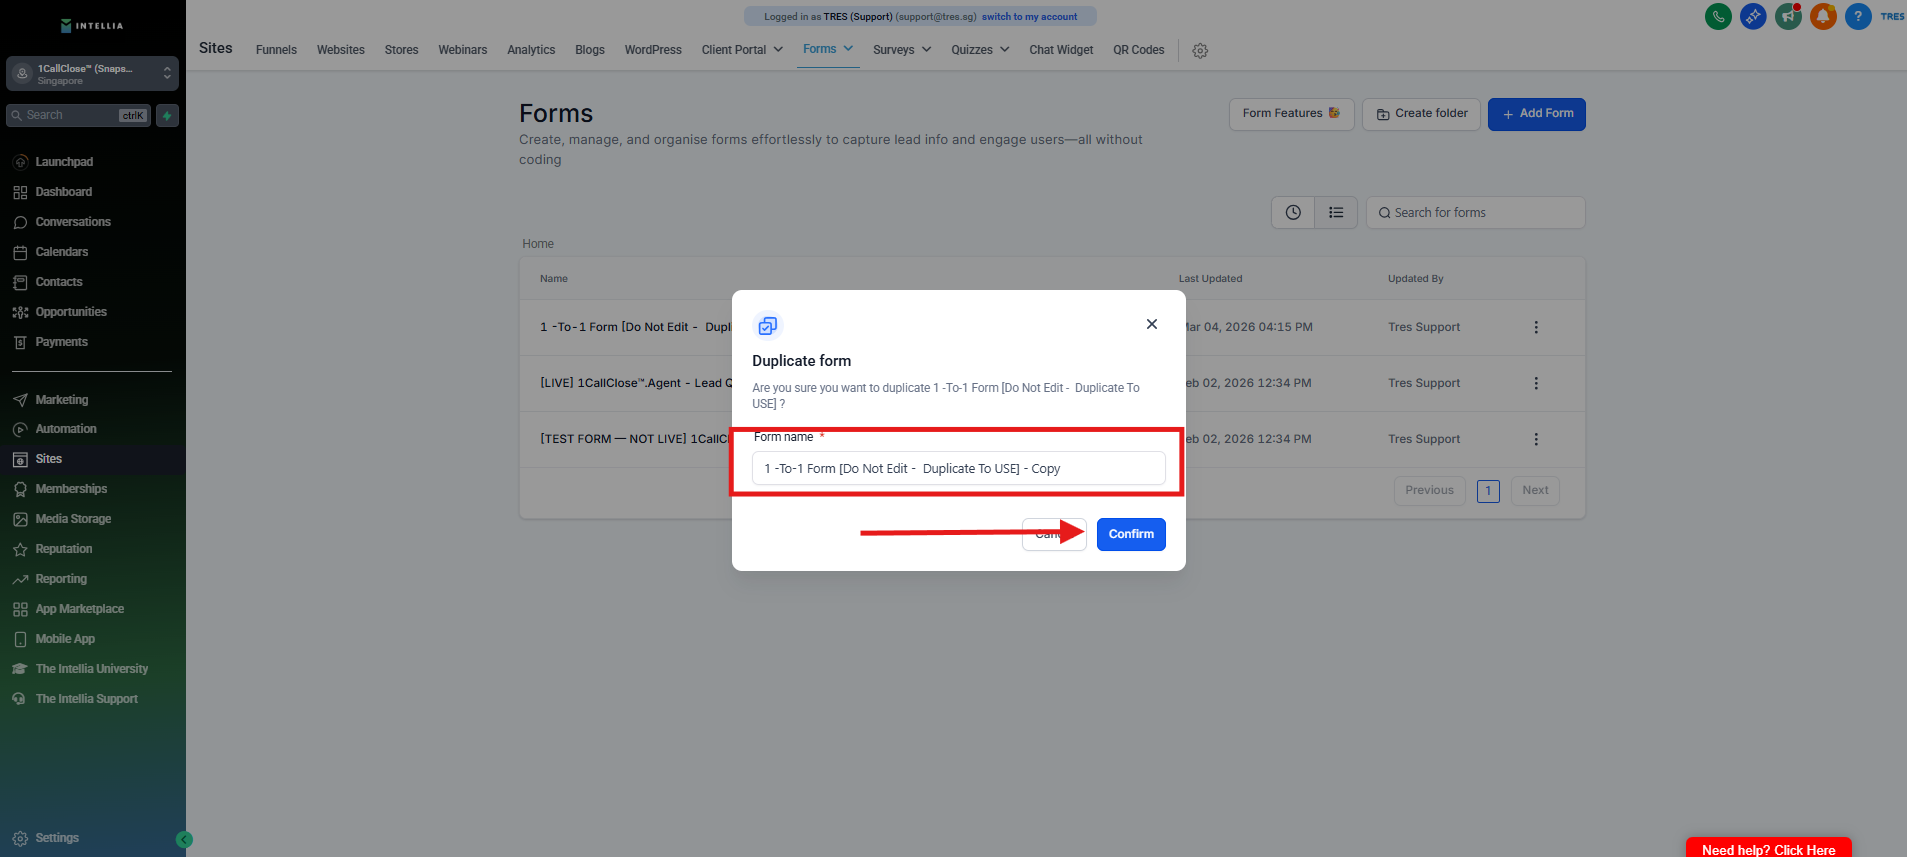
Step 4 : Edit the Form name field to your desired name > Click Confirm.
Step 5 : Look for your Cloned Webinar Registration form and Click on it to edit >
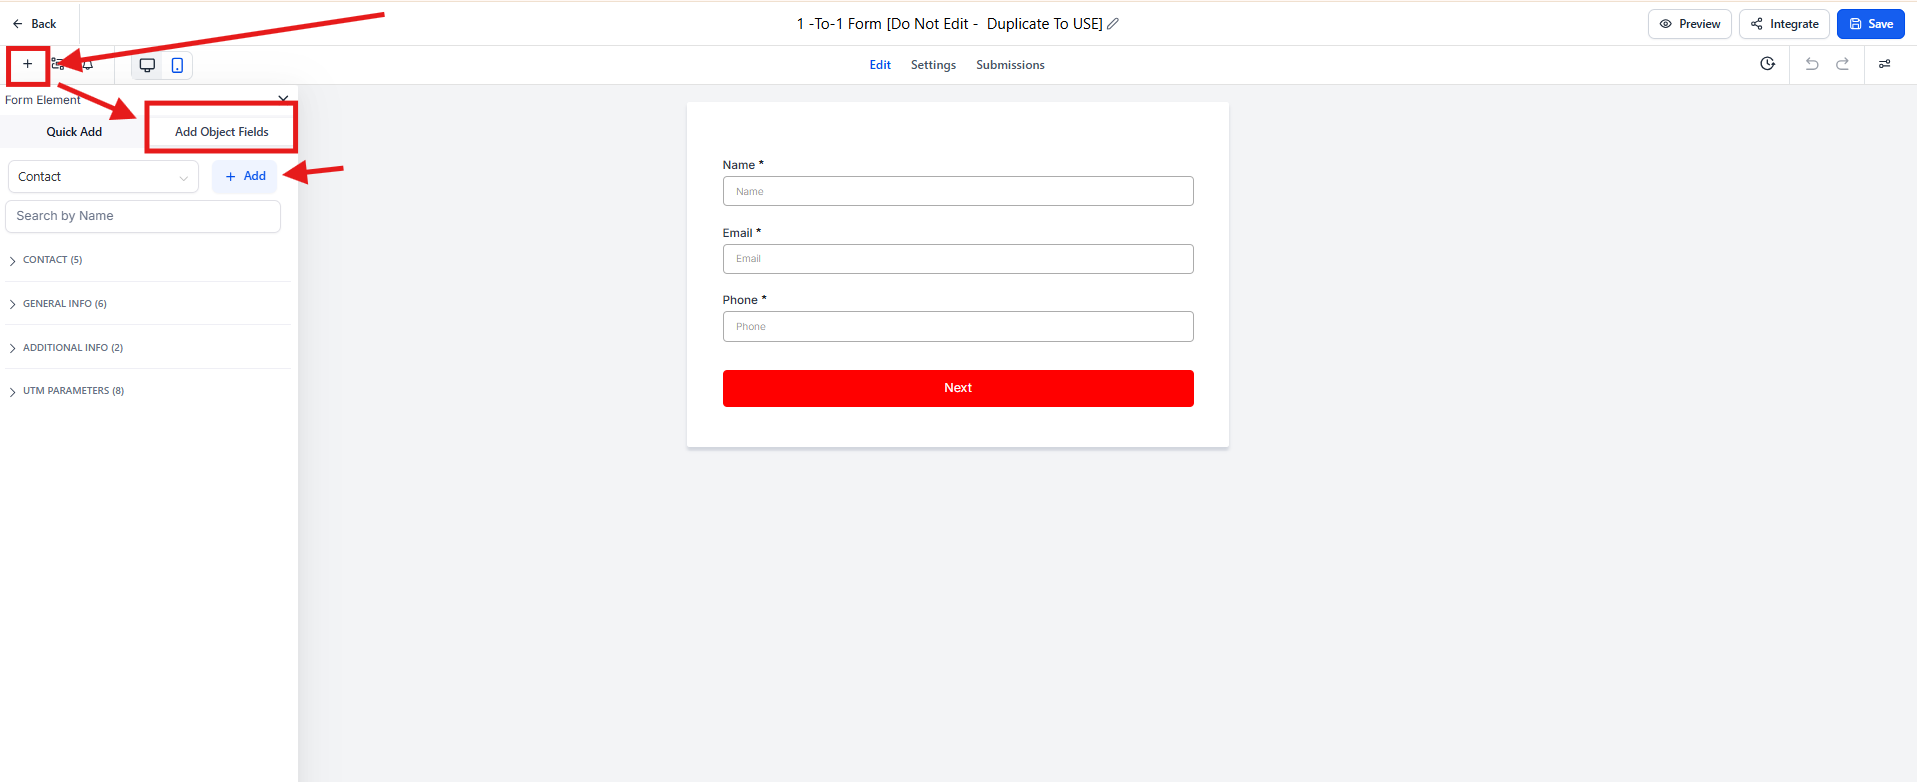
Once you're on the Form builder, click the Plus icon > Click Custom Fields >Click Add to add your own Webinar date select field.
Step 6 : Choose Dropdown (Single) > Click Next
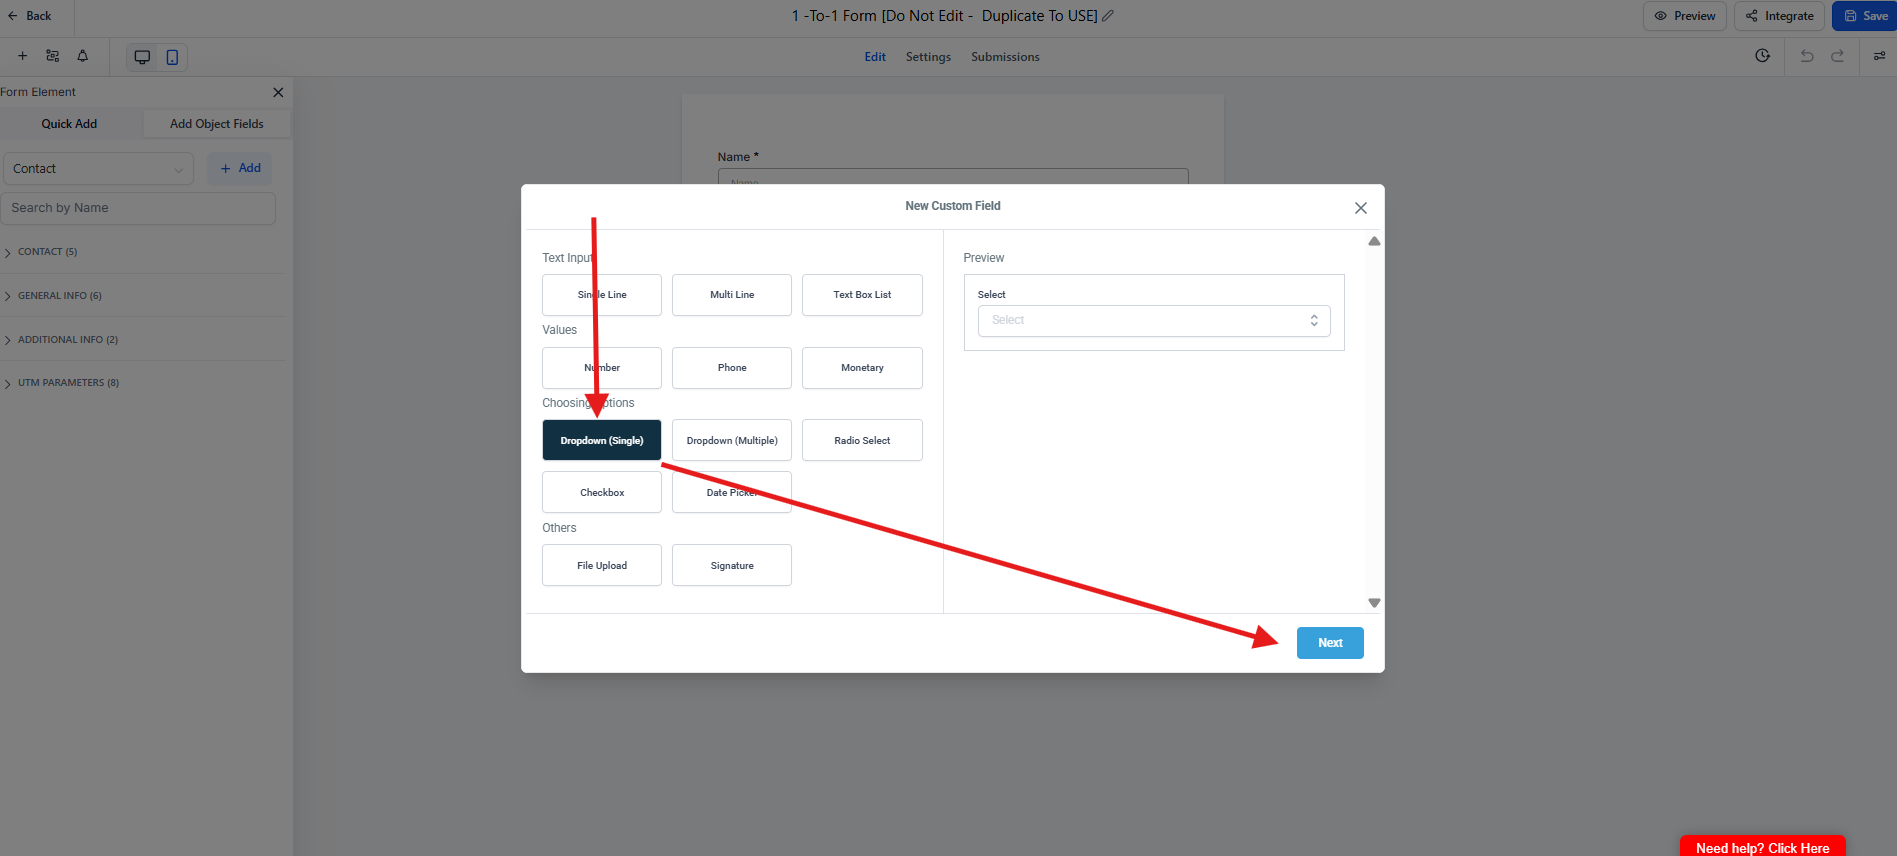
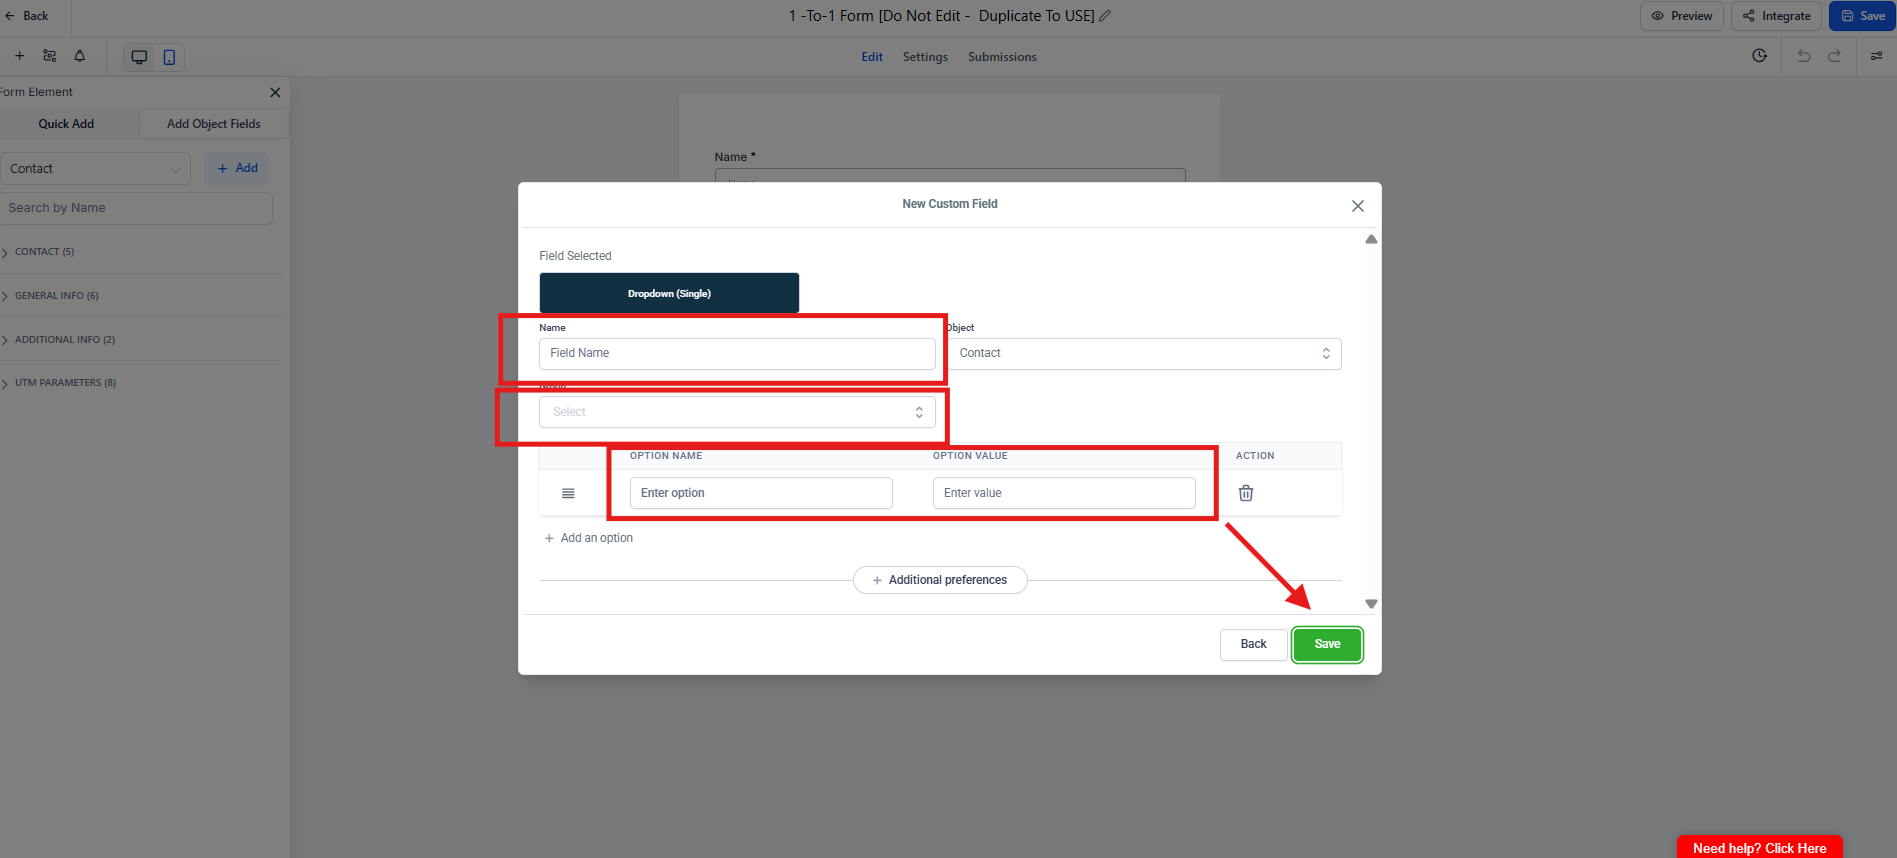
Step 7 :Edit the Name field >Select Additional info under Group > Enter your preferred Webinar Date option > Click Save.
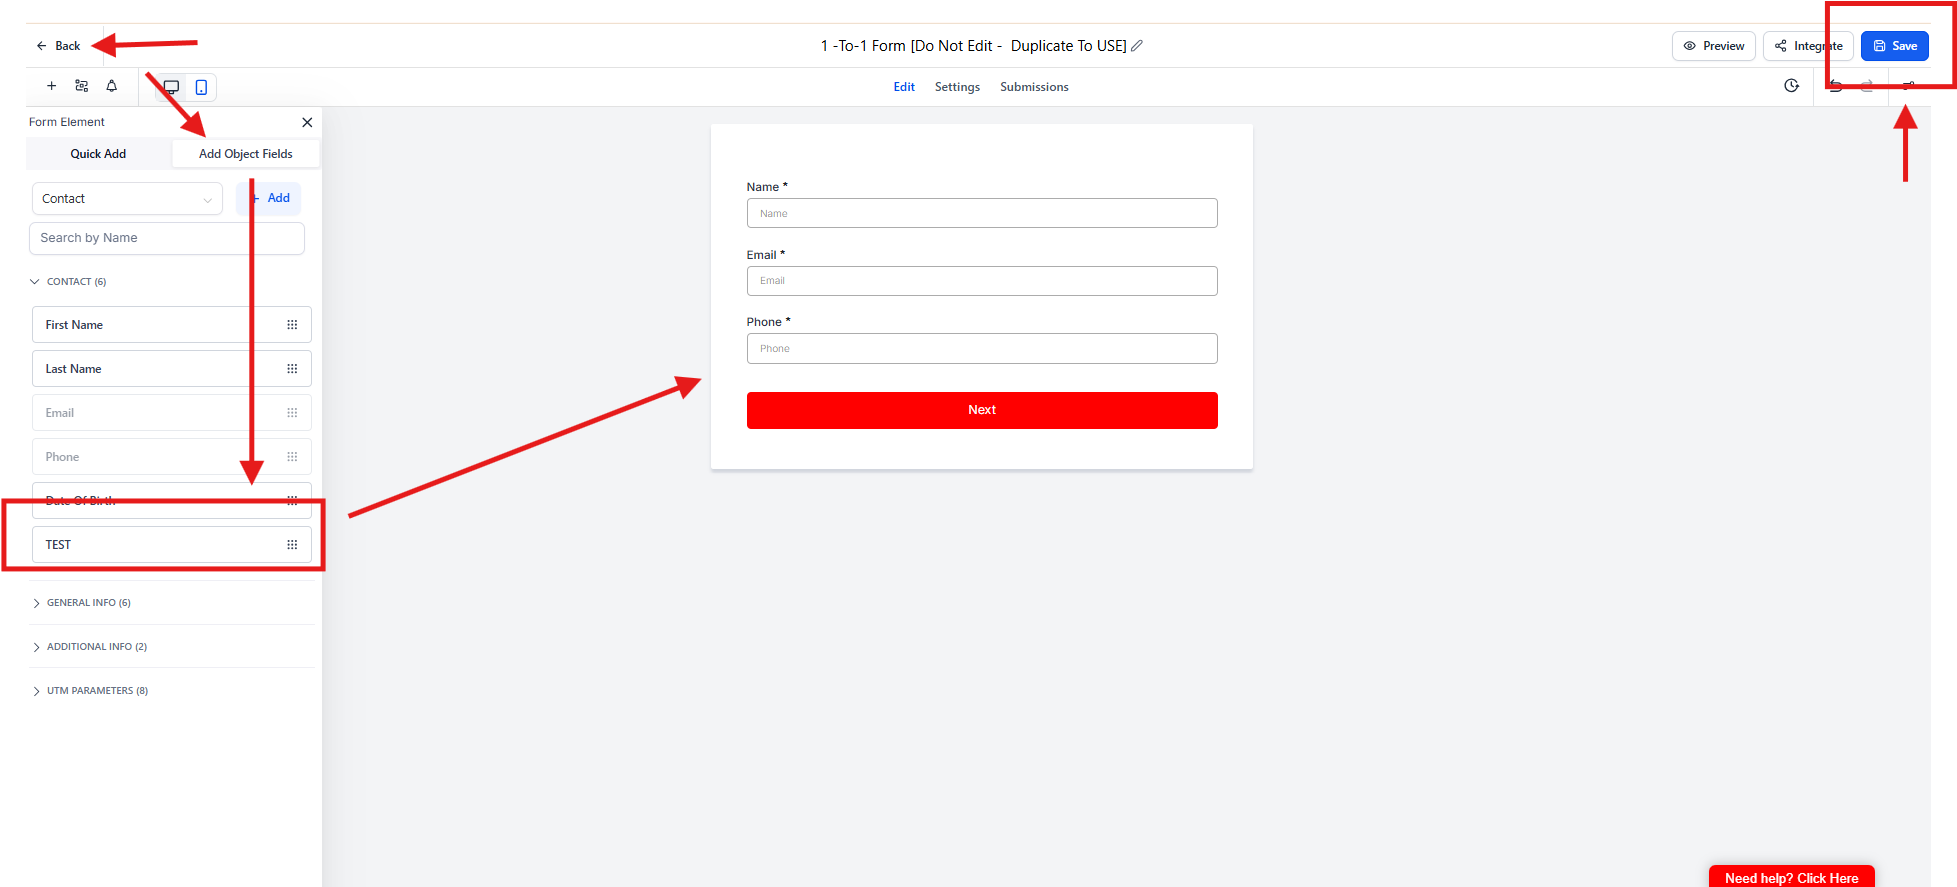
Step 8 :Click Custom Fields > Look for the Custom field you just created under additional info. Then drag and drop it to the form in the middle >Click Save > Click Back.
You can refer to this article on how to purchase the domain :
Click this link to be directed to another site.
Step 1: Go to Settings > click the "Domains"
Step 2 : click the"+ Add" then add your domain name > once you added, you will having the DNS Record
Step 3 : you will add the DNS Record to your Domain provider (example : GoDaddy, CLDY, Cloudflare, Google Domain etc.)
Step 4 : once added the DNS Record to your Domain Provider.
Step 5 : kindly go back to your Account > Go back to the Sites > click the Funnel > click the Webinar Funnel You Clone > on the Funnel Builder, you will see the Settings.
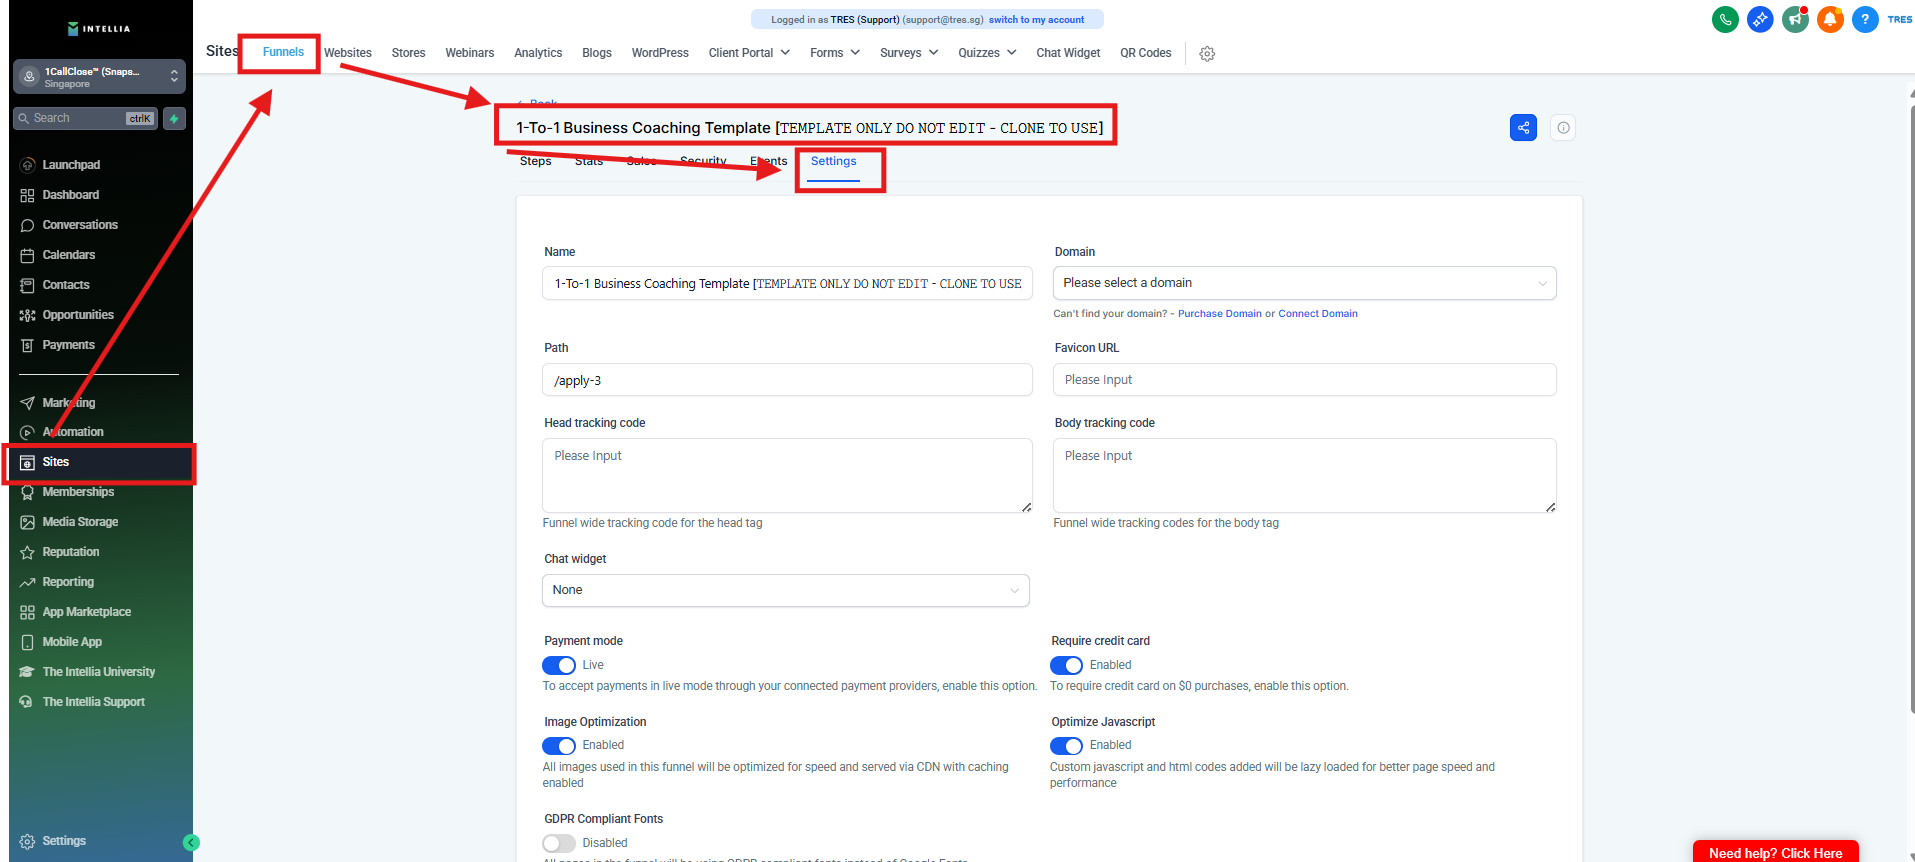
Step 6 : click the Settings > then select the Domain.
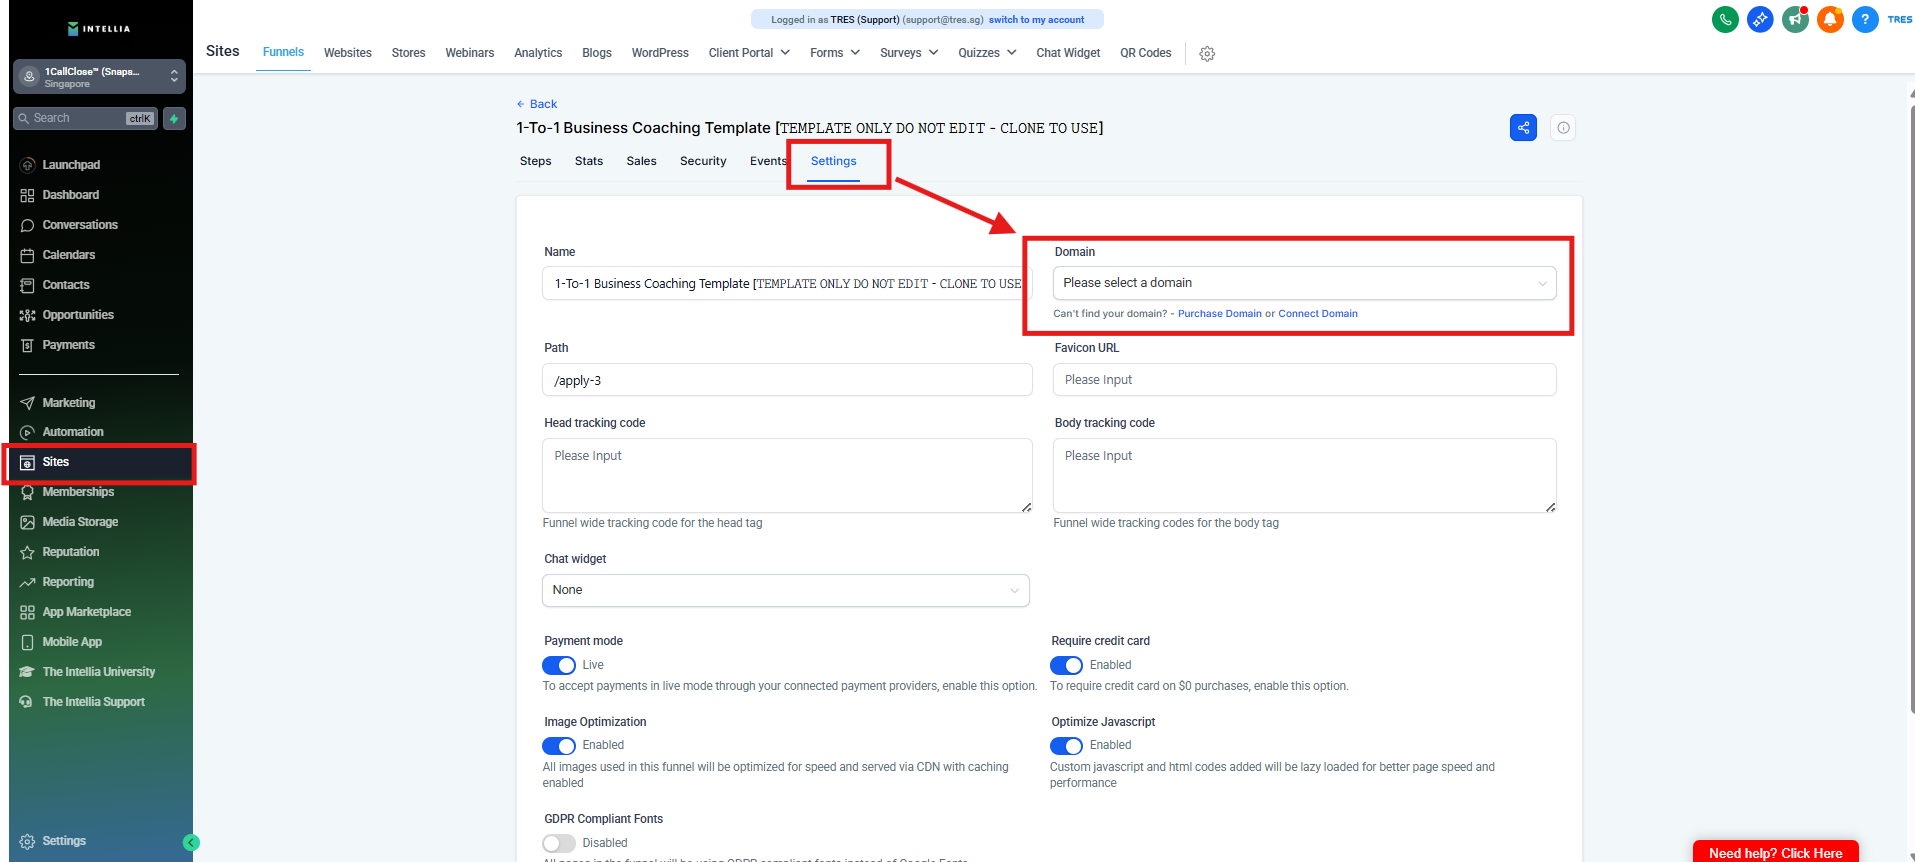
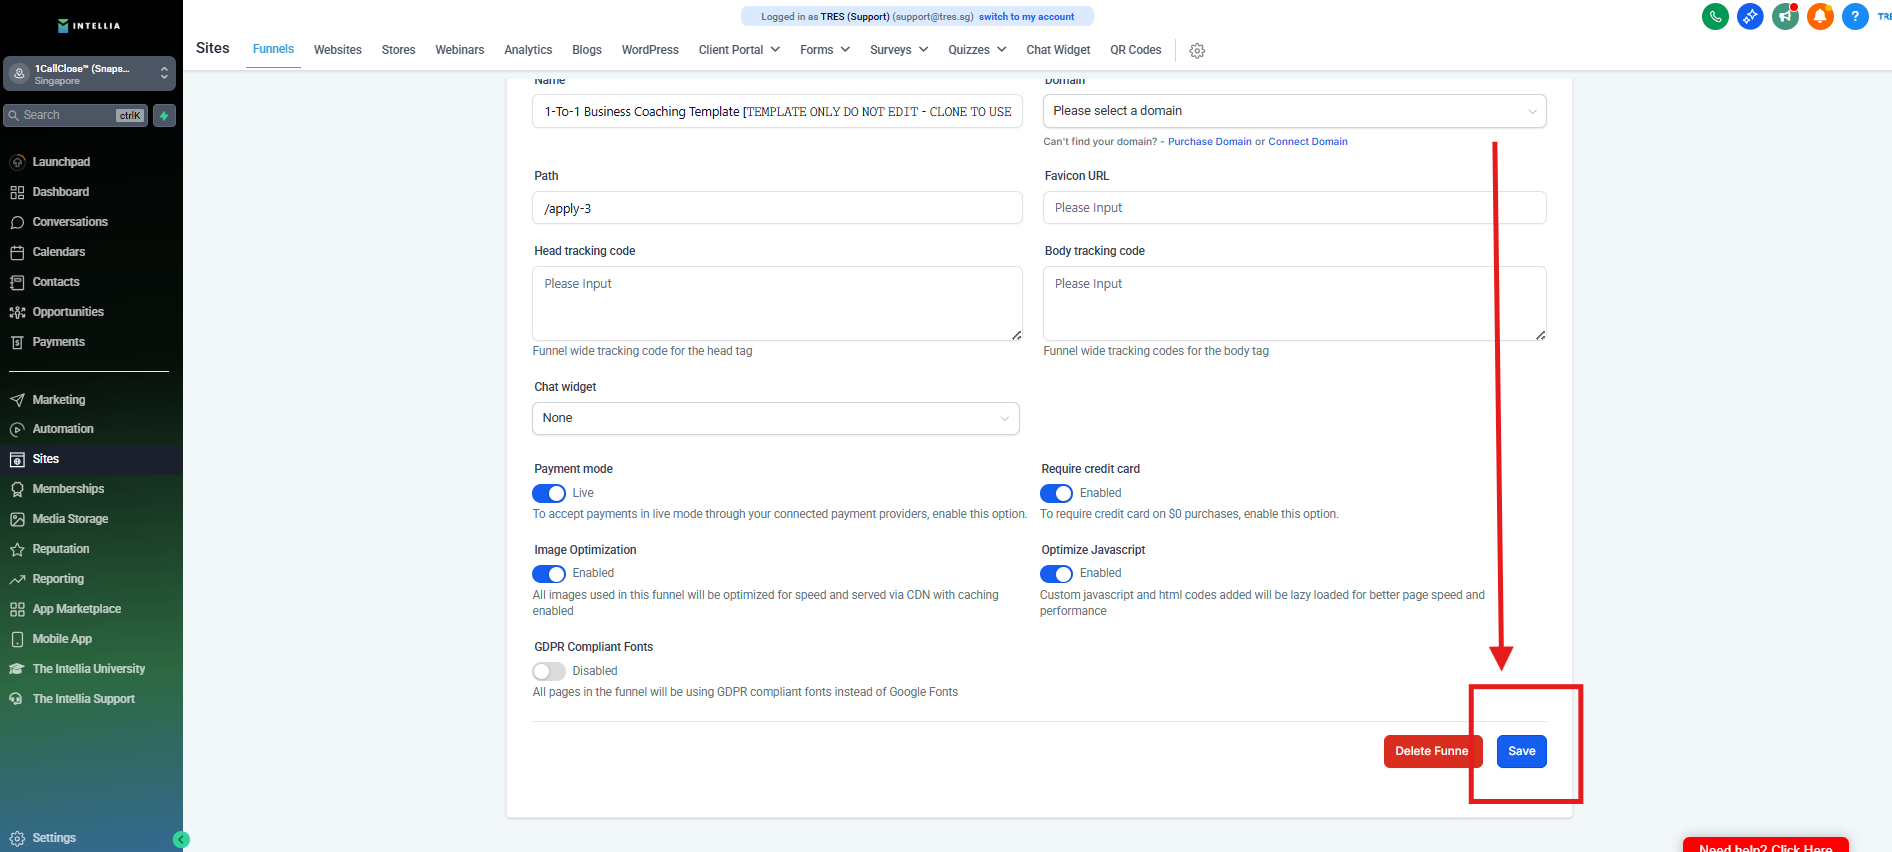
Step 7 : then Save.
Step 1 : Go to Payments.
Step 2 : click the Integrations
Step 3 : Find the Stripe > click the Connect.
Step 4 : once added the Stripe Account, it will see the Stripe that says Connected.
How To Clone The Funnel Template
Step 9 : Click Funnels > Click FCK Funnel Template > Click the 3 little dot Icon > Then click Clone >
Click the Funnel Name Field > And Name it.
Step 10 : Then go to Payments > Click Products > Create Products.
Step 11 : Then Enter Product Name Field > Also the Product Collection.
Step 12 : Under the Prices Field put your desire Amount for your Products > and make sure the currency is SGD > And if you need Additional Price, Just click the Additional Options.
Step 13 : Do not forget to hit the Save.